CREATING A CREATIVE STUDIO
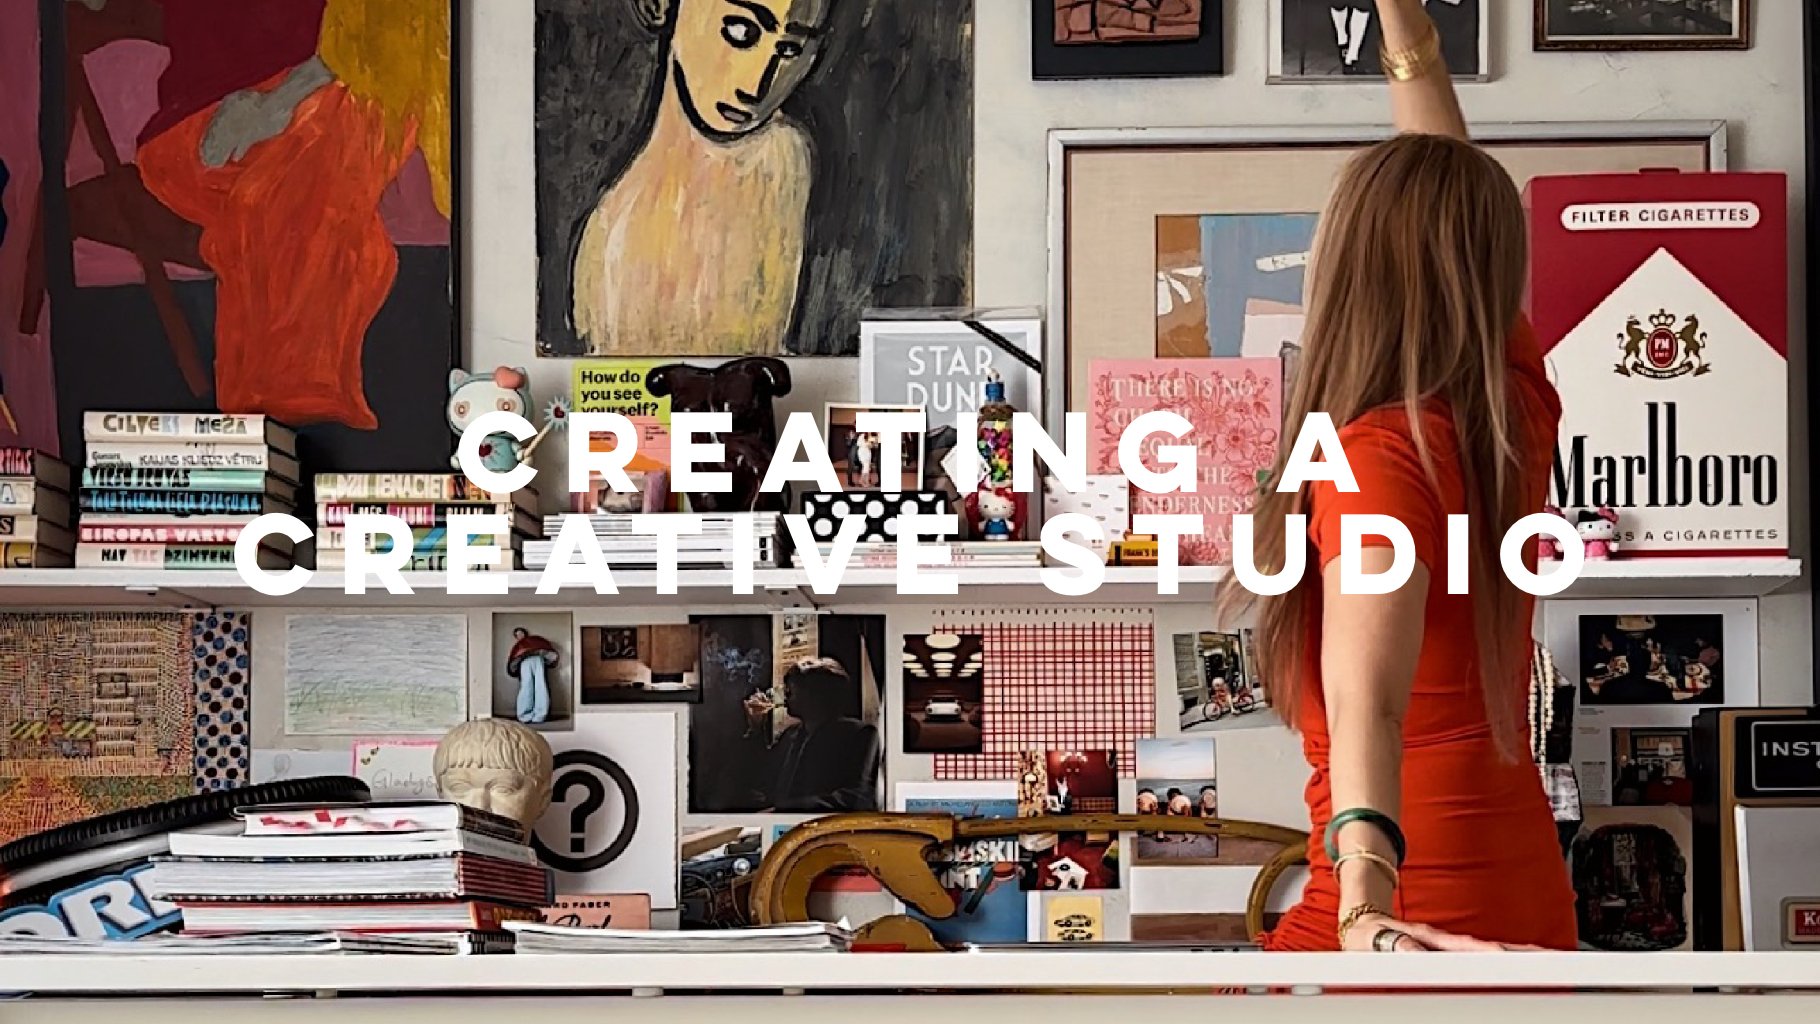
CREATING A CREATIVE STUDIO. WATCH THE NEW EPISODE ON YOUTUBE. New episode drops every Sunday at 12pm📷. Please watch and subscribe 🫶🏼. Link in bio.
It took a couple of days and some late nights to turn one of the living room into a creative studio. This has been in my thoughts for a very long time and am beyond happy that this finally happened 💭👏🏼🎈🎉!

setting the table for a dinner parties 🏡🎉
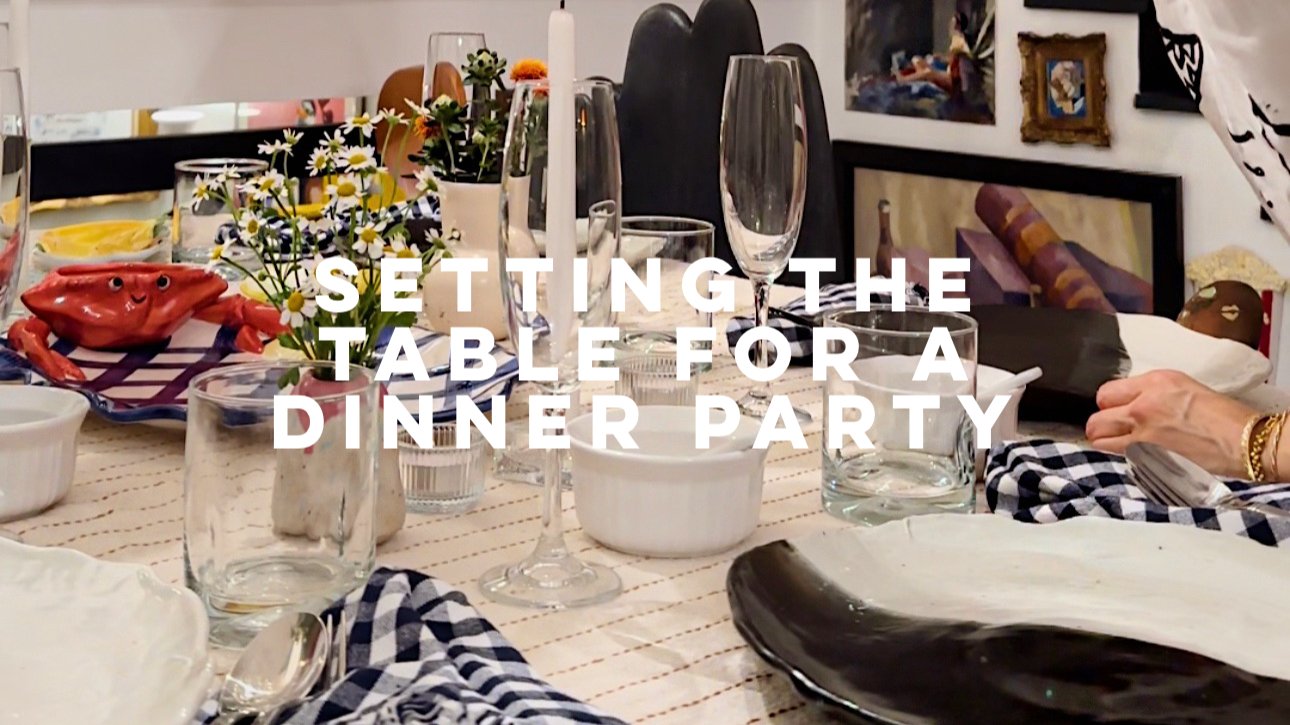
I love setting the table for a dinner parties 🏡🎉 . It’s so fun to see the table come alive with different elements, textures and colors. Also, never fussing about rules and placements of things. Keeping the table causal allows guest to relax and enjoy the conversations while eating and sipping 🥂🍽️🥬🍓🥘🍰.
I always start by dressing the table with a tablecloth. Followed by flowers and the candles. Next up, are serving wares, napkins, silverwares and glassware is usually last. The lighting during parties are so important too💡🕯️. I always do a test run by turning up or down the lights in the house and lighting all candles to see if it is giving the mood I am looking for 💞🤌🏻.
Dinner parties are not just about the food, it’s also an experience for your guests. So have fun with the tablescaping, it’s your house, your table and your party 🎉 🎈🏡🕯️

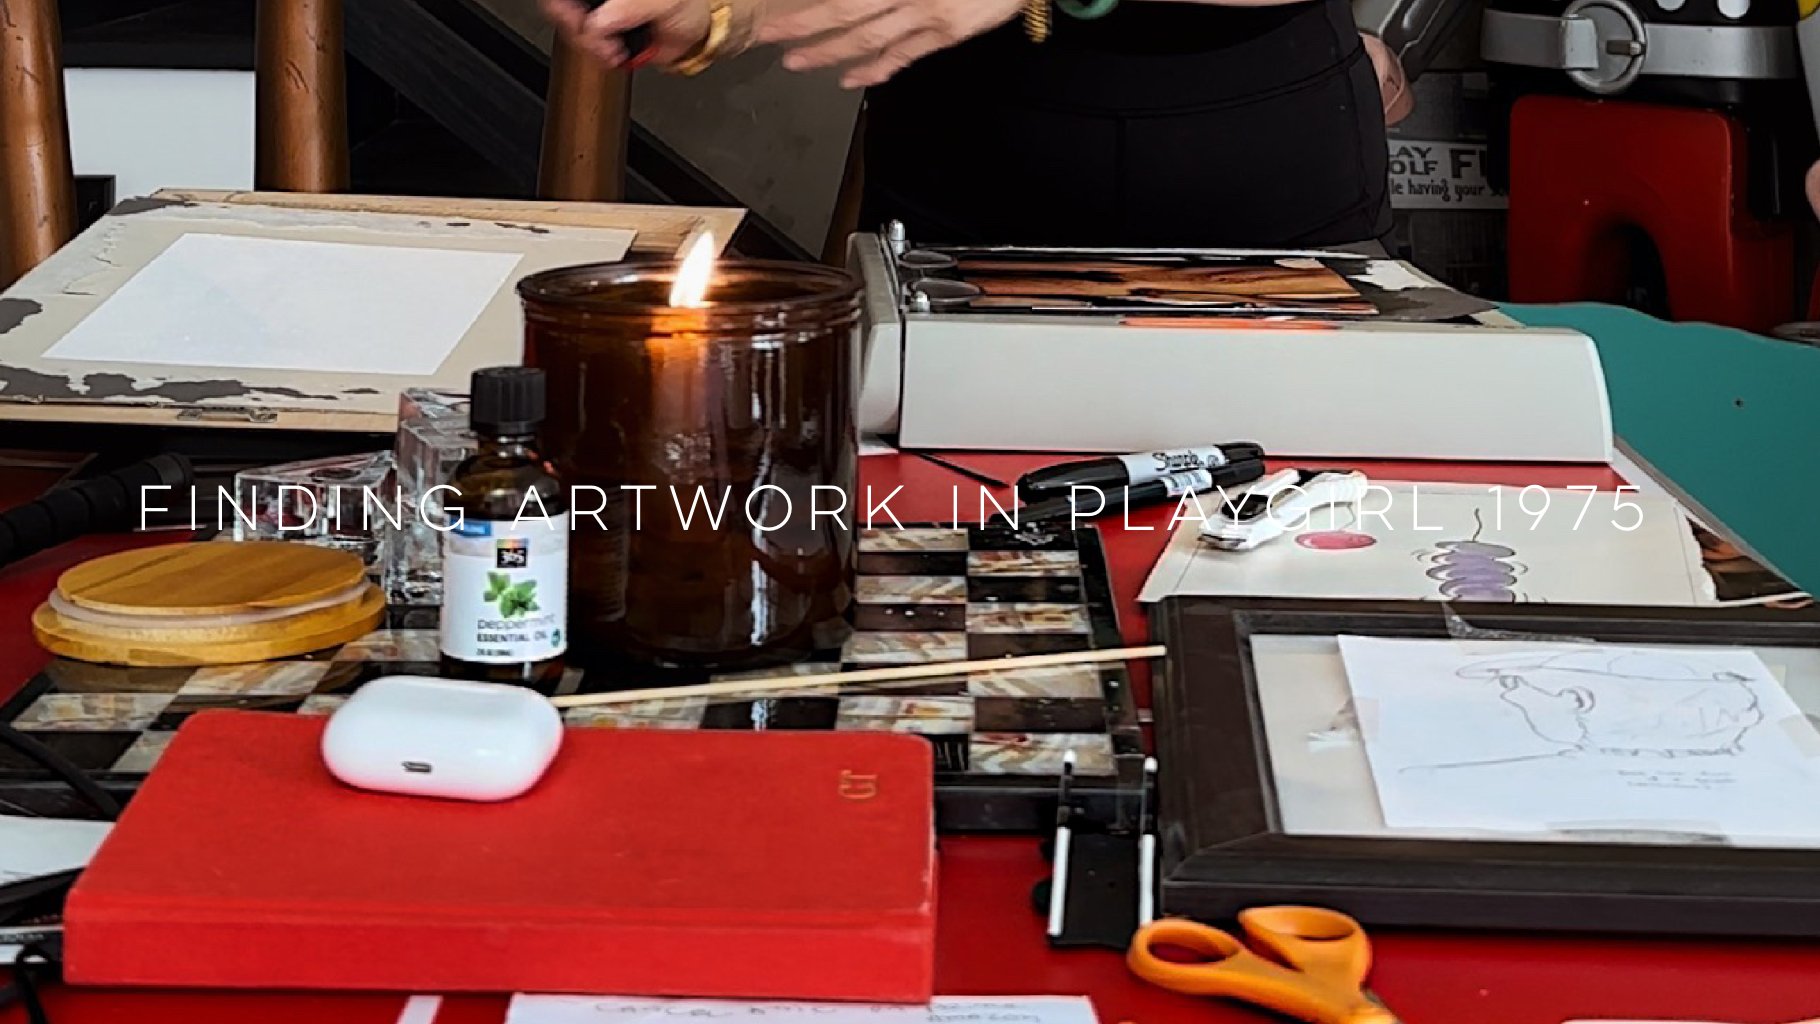
A simple DIY frame for canvas artwork 🖼️
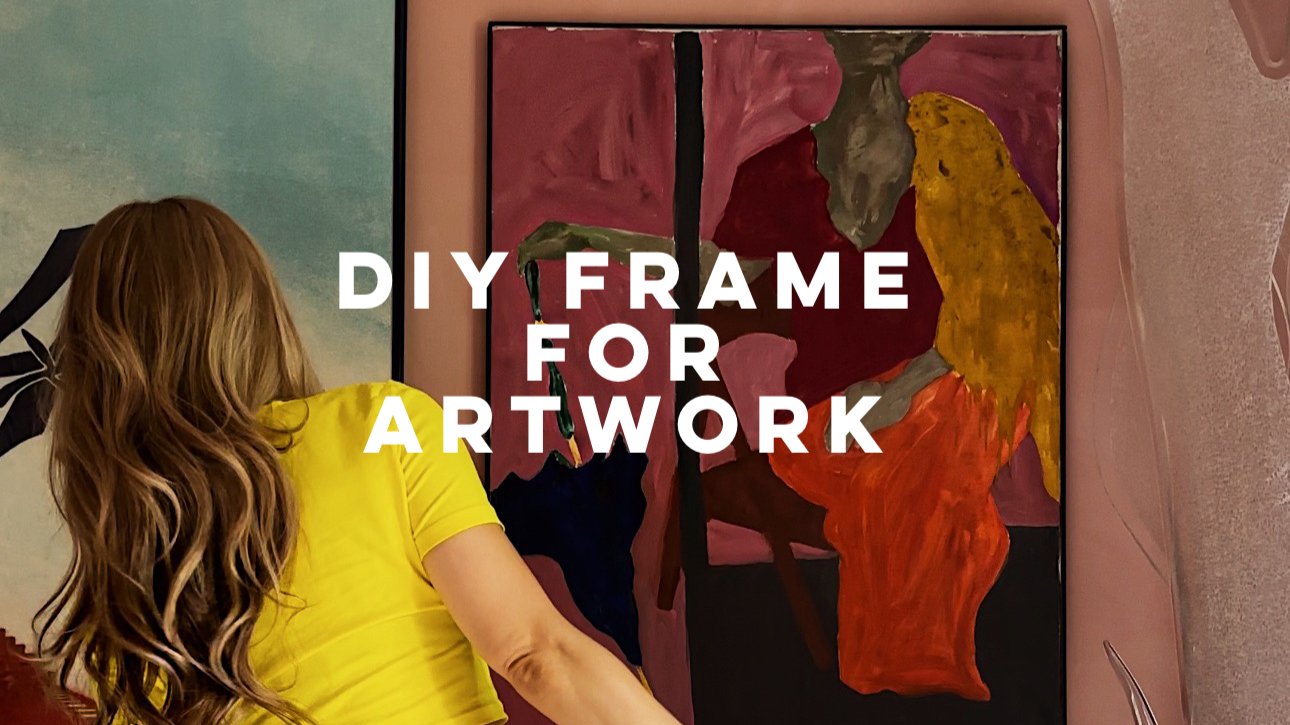
A simple DIY frame for canvas artwork 🖼️. All you need is a couple of pine lattice strips, a spray can of ultracover paint and prime, a box of nails, a saw and patience 🔨🪚💓⚫️.

Someone asked “Do you have a more detailed video on this? Wanted to make something like this for my cal king.”
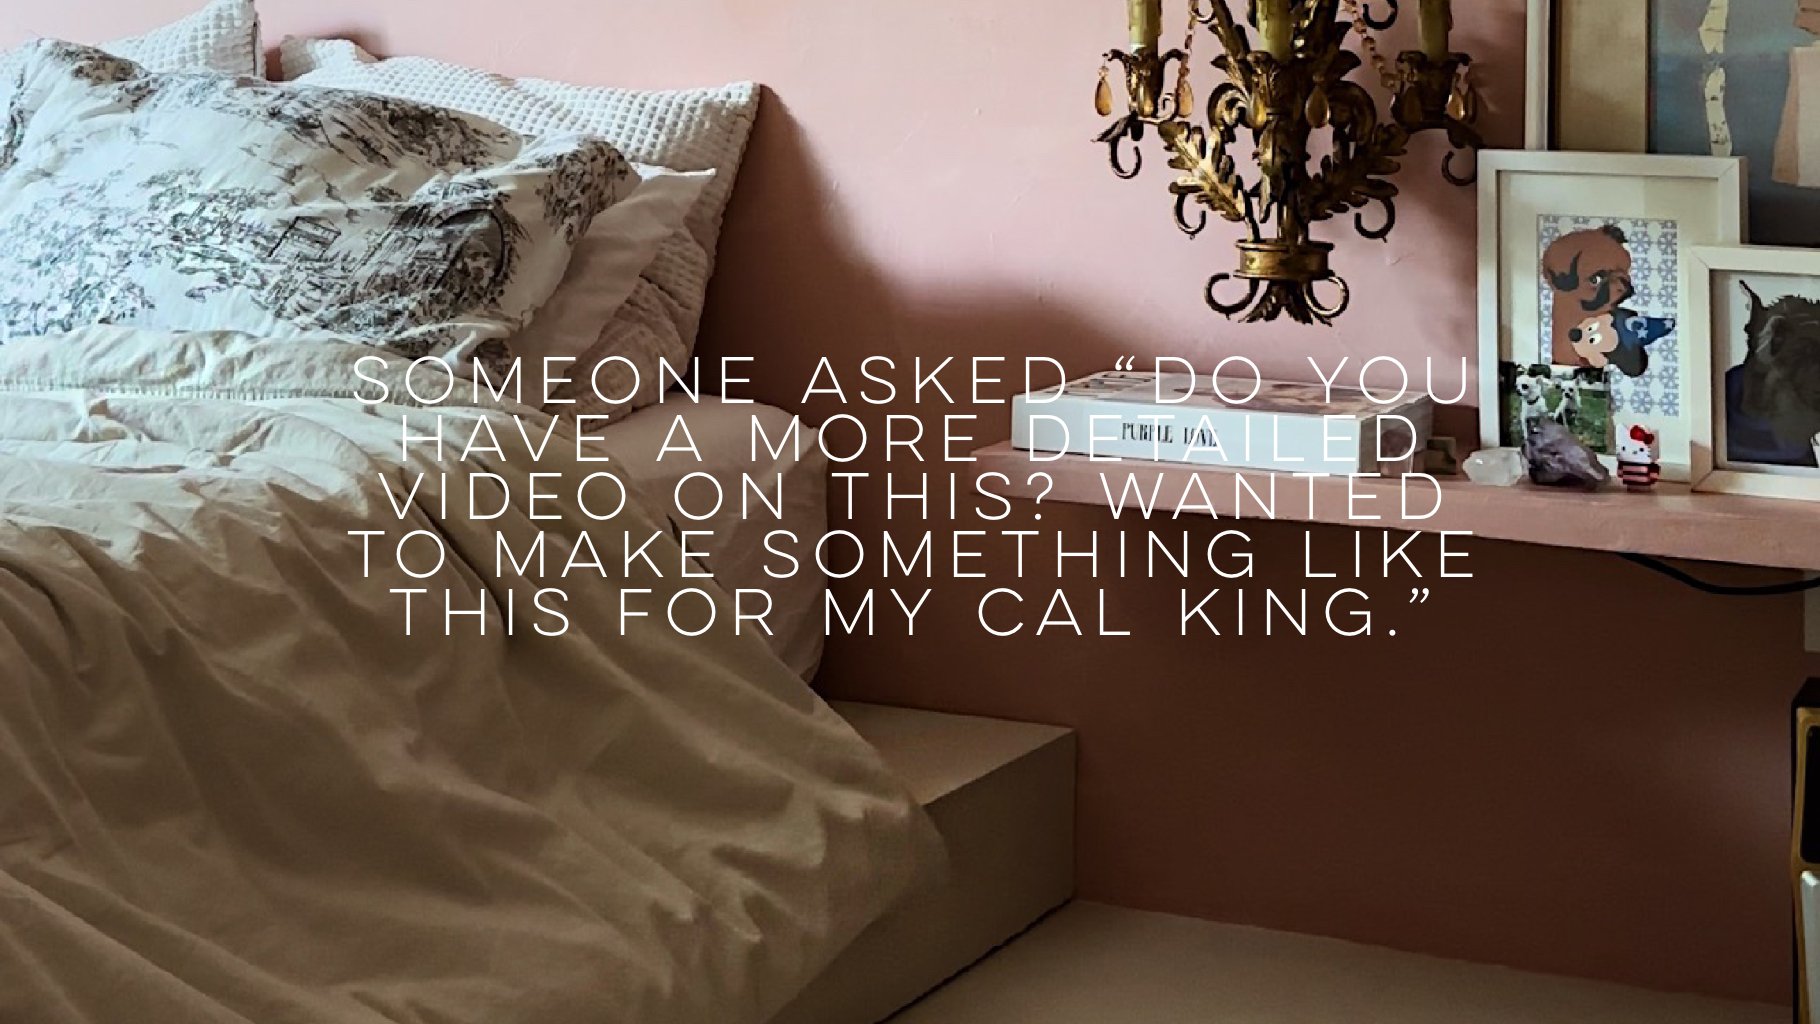
Someone asked “Do you have a more detailed video on this? Wanted to make something like this for my cal king.”
First things first, was to decide how big we wanted the platform bed to be, while keeping in mind the size of our bedroom📏📐. Nothing too big, otherwise, the room will feel cramp.
We decided to build a 90” by 80” by 6 1/2” high platform bed. Using 3/4” particleboard for the top and 2 x 6 framing lumbers for the base. 4 pieces of framing lumber to frame and 3 pieces on the inside of the base as support. Finally, screw all the pieces together. And because I am a little extra, I decided to cement and paint the platform bed. I wanted the bed and floors to have a seamless look 🪚🧰🔨🔩. Hope this helps 😘💝.

Someone asked “How does one create a space like this without it looking tacky help LOL.”

Someone asked “How does one create a space like this without it looking tacky help LOL.”
One simple way is to take things out of their context🖱️🥤🥣🚬. When that happens, you are creating the element of surprise 😲😮. The unexpected feeling arises allowing the objects to look more like artwork, sculpture pieces… depending how you are trying to present it. So it becomes less tacky and more fun 🥳💝.

New old bedroom
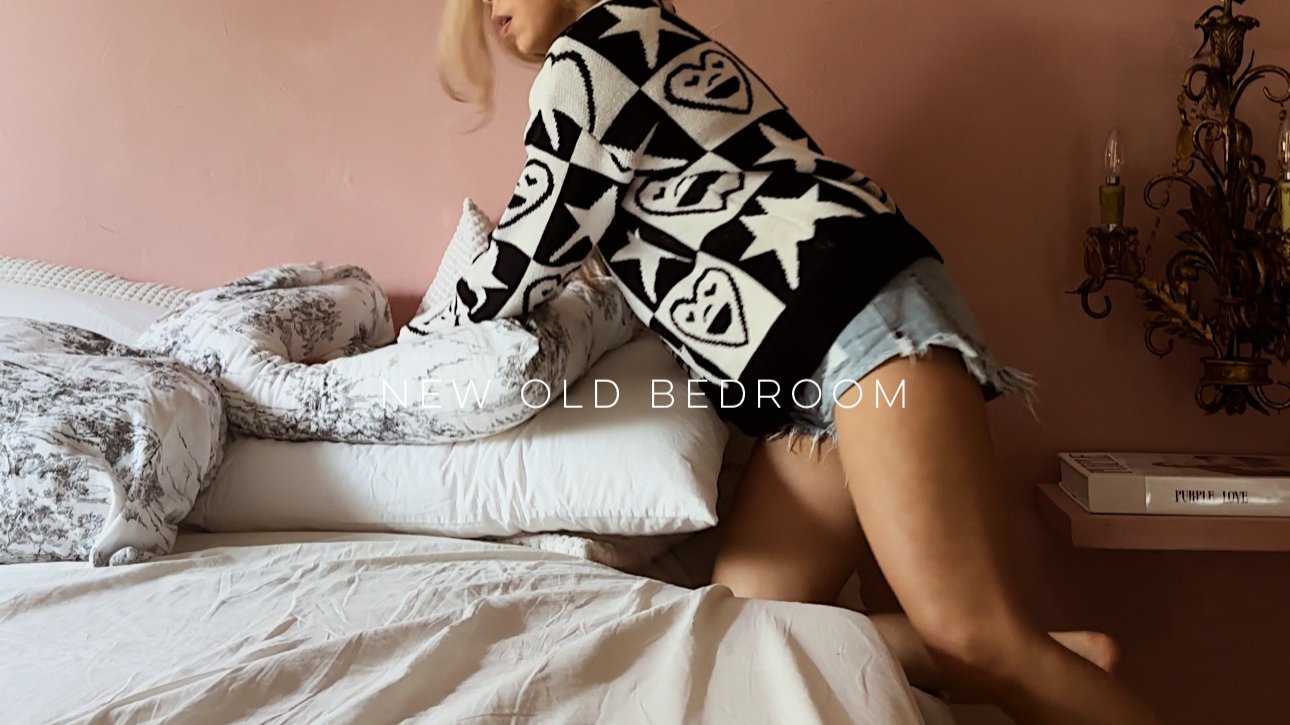
My new old bedroom 💝! As much as I love camping ⛺️ in the living room, it feels so good to be back in the bedroom. We got new floors, a shade of “dirty” pink on the walls, new old light fixtures and the platform bed that I always wanted🛏️🍪🖼️💡🍸. Happiness👏🏼👏🏼🎉 ! Life is so good 🤓✌🏼.
📌Base color : BEHR Dynasty Marquee Bubble Shell
📌Top color : BEHR Dynasty Marquee Pink Quartz

LAYER YOUR LIGHTS
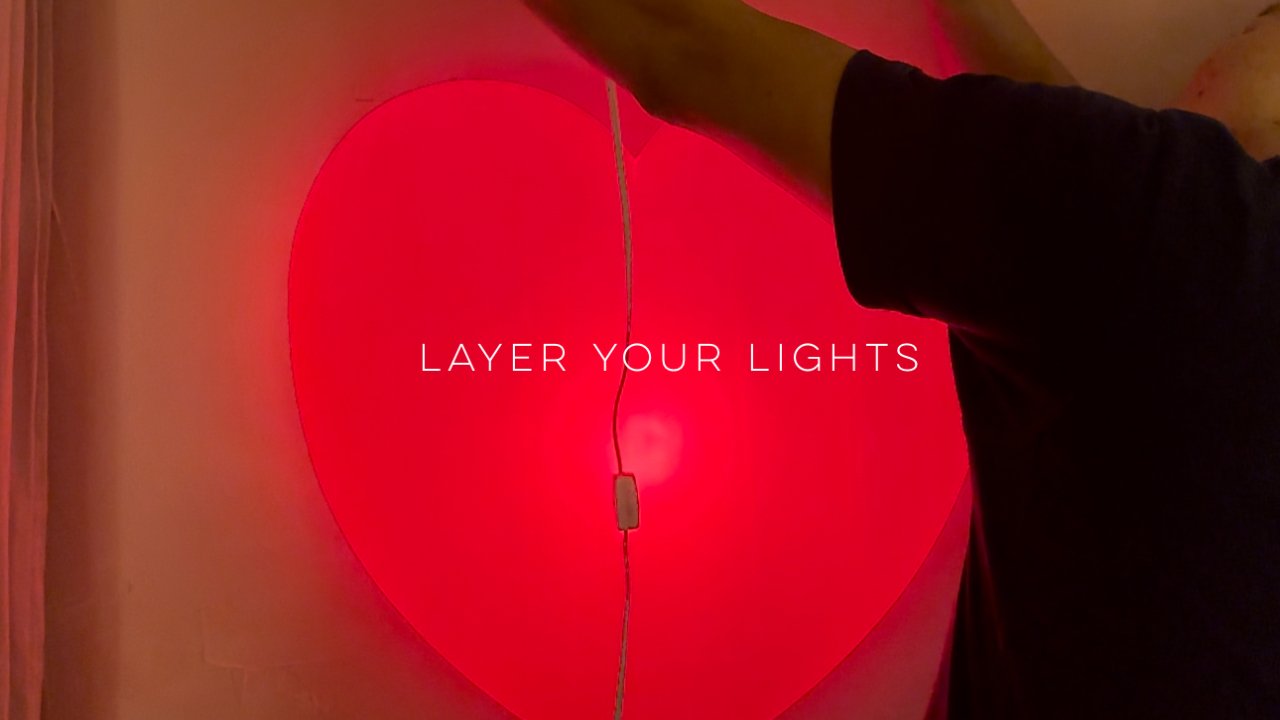
When designing a room, always layer your light fixtures. Have a variety of different styles and shapes of light fixtures like table lamps, floor lamps, chandeliers, night lights… etc. This will create warmth and cast interesting shadow shapes on the wall, which gives the room depth and interest making the space extra cozy 💡🩷❤️🔌.
♥️ Vintage heart shape lights are from @round.plump.apple
BEDROOM FLOATING SHELVES
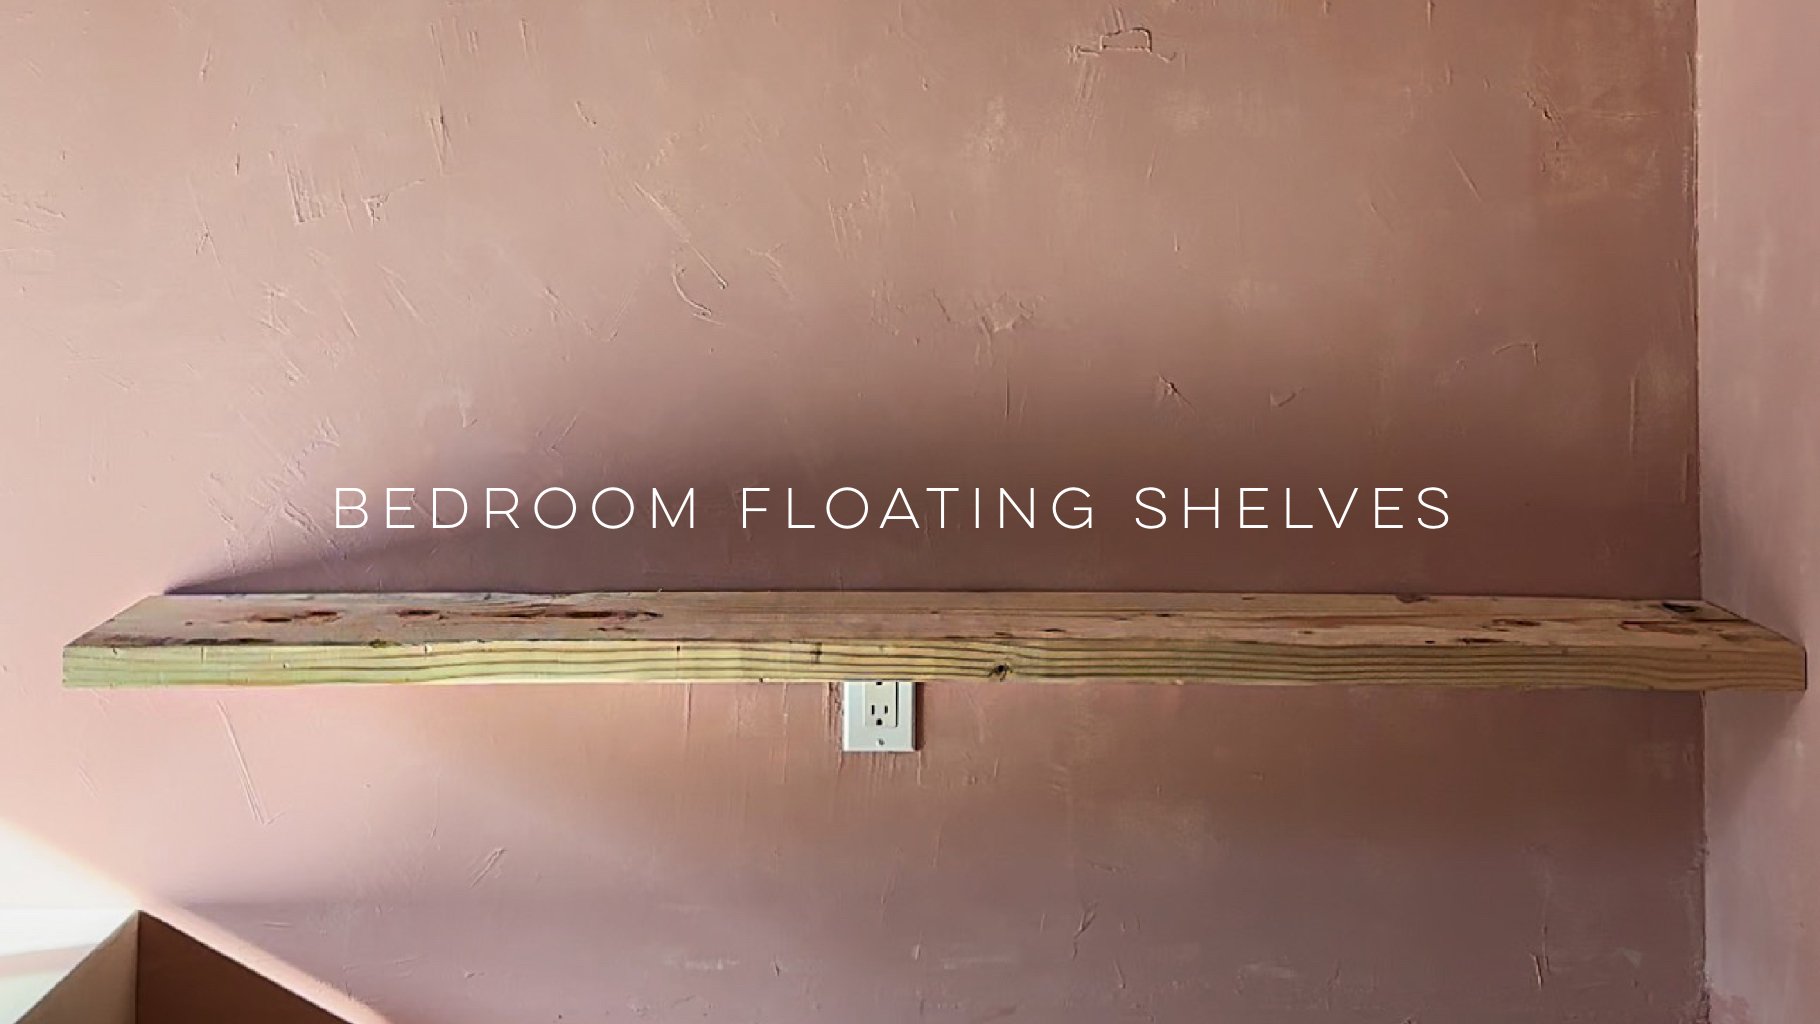
For a little while, I had internal debates about what’s more appropriate for our bedside 1️⃣ side tables or 2️⃣ floating shelves?
For now, it’s floating shelves for the win 🥇. Order a couple of metal brackets from Amazon, picked up some 11 1/4” wide by 1 1/2” thick framing lumber from Home Depot, cut them to size and mounted them on the wall📏🪚🔨🧰.
I must admit the hardest part of hanging these shelves was trying to figure out what was ideal height for them to be at 💬. After much debate, again, we decided to have the floating shelves the same height as our mattress 👌🏼.
Next up, would be to cement and paint the shelves 👏🏼

Never be afraid to do this when designing a space 👉🏼 Juxtapose.

Never be afraid to do this when designing a space 👉🏼 Juxtapose. Try mixing different design styles, objects from eras, different make of materials… all of that can create the unexpected. The element of surprise is what keeps the space interesting and uniquely your’s.
Creating the unexpected 👉🏼 I decided to switch out the chain that is attached to this vintage rococo chandelier for a blue and white striped rope. This gives the chandelier a more modern feel 🔗✨👌🏼. Instead of hanging the chandelier high up ( like how it normally would be hung ), I hung it low.

Someone asked “ Can you show how you tied the rope to the light?”

Someone asked “ Can you show how you tied the rope to the light?”
I don’t remember who taught me how to tie this specific knot nor the name of it but I do know it secures really well.
You take one end of the rope and loop it around 3 times, 5 times or whatever that works for you. Next, take that end of the rope and shove it through the middle of the loops you just made. Lastly, pull on it really tight to secure your knot.
Do remember to buy your rope a couple of feet longer than what you actually need. More is always better than less, well at least in this situation 😅.

CLOSET TOUR

Finally, a closet tour to share 👚👗👖👙👢🎉! I am extremely happy that my closet is finally done and everything is back where it belongs. I love categorizing my closet by color 🌈, this helps me visualize and be more efficient when picking out my outfits. And because I have ridden 95% of my vintage clothes📦, this has open up space, allowing me to organize my tops, dresses, pants, etc separately. Plus, having my stuff sorted out this way helps me see what I have in my closet, as I am guilty of forgetting what I have brought 😅🛍️.

Someone asked “I love the walls! Can you share more about the floors? What did you put over the plywood? I’d love to see & hear more details about the floor”

Someone asked “I love the walls! Can you share more about the floors? What did you put over the plywood? I’d love to see & hear more details about the floor”
🪣First things first, we laid 1/4 inch OBS board down.
🪣Caulk the edges to prevent any concrete slipping through. Plus, I decided to skip installing baseboards to have a cleaner look.
🪣Sealing the floors with Redford Waterproofing and crack prevent membrane. Love this stuff.
🪣Mix the concrete. SURECRETE
CROTEK is the brand we got. Did 2 layers of it.
🪣Sanding. This helps smooth out any unevenness in the floors.
🪣Finally, sealing the floors with a floor sealant. I will be sharing more thoughts of the different brands we have used throughout the house in stories.
The process is very simple. It’s just work and lots of mess, especially the dust from sanding🤪. But if you love the look of concrete floors, imperfections and the simplicity of it, do give this a whirl ❤️.

IKEA VIDGA QUESTION

Someone asked “Hi Gladys! I was planning to buy this ikea ceiling track system for our new build house. How is the quality? Is it pretty sturdy or should i just buy the curtain rods? wanted to create a wrap around affect with this system using the corner pieces. Thanks!!”
I have used the IKEA VIDGA track system for a couple days and I am really loving it 💙💛💙. The quality of the railing is made out of light weight metal and the glider hooks are plastic. They are wonderful if you are going to use lighter or sheer curtains.
I would definitely not recommend using with it heavy fabric curtain panels, as those glider hooks may not hold up with all the pulling and tugging when you are trying to open and close the curtains.
If you like a nice uniform pleated look with your curtains, I recommend the getting the metal hooks.
The track system is easy to use, easy to install, so I do recommend getting some if you are thinking of having them in your homes 🙂🏡👌🏼.
DIRTY PINK

In the late 90s my dad signed me up for a class with this lady, who just returned from the USA. She was teaching a paint technique with special wall paint, sponges and some other tools. I took the class, I loved it so much, started painting my bedroom and all over my mom’s house 🏡 🇸🇬😅.
Fast forward today, I am still doing what I learned from that lady but a simplified version of it. I loved textures, imperfections, aged, “dirty” walls and if you do too, this maybe something you would like to venture into☺️.
📝 You will need 2 colors of paint, a paint roller, a brush, 2 sponges and a spray bottle filled with water.
These are colors I used:
📌Base color : BEHR Dynasty Marquee Bubble Shell
📌Top color : BEHR Dynasty Marquee Pink Quartz
🌈 Start with one coat of base color using a paint roller and a brush for the edges. I don’t fuss with perfection or making sure the entire wall is covered in paint. If I missed some spots, l am okay with it.
🧽 Once the base color is dried, with a sponge, dab some top color paint onto the wall, spray some water on it and smear it over a section off the wall.
💧With a new dry sponge and spray more water onto the smear paint and work in circular motions to dilute the paint to till your desired effect.
There is no right or wrong way to this. Have fun and enjoy the process 💫💓.

Metal book shelves are your best friends when hanging over oversized objects📚🔨🪜

Metal book shelves are your best friends when hanging over oversized objects📚🔨🪜. They are sturdy and they can handle some weight. Best of all, they magical disappear on the wall and let the object be the subject of focus 🪄🙌🏼! Thank you @turquoisevintage for sending Tony to me ❤️.
Gold metal bookshelf 📌 @CB2(old)
.


DIY CONCRETE WALLS
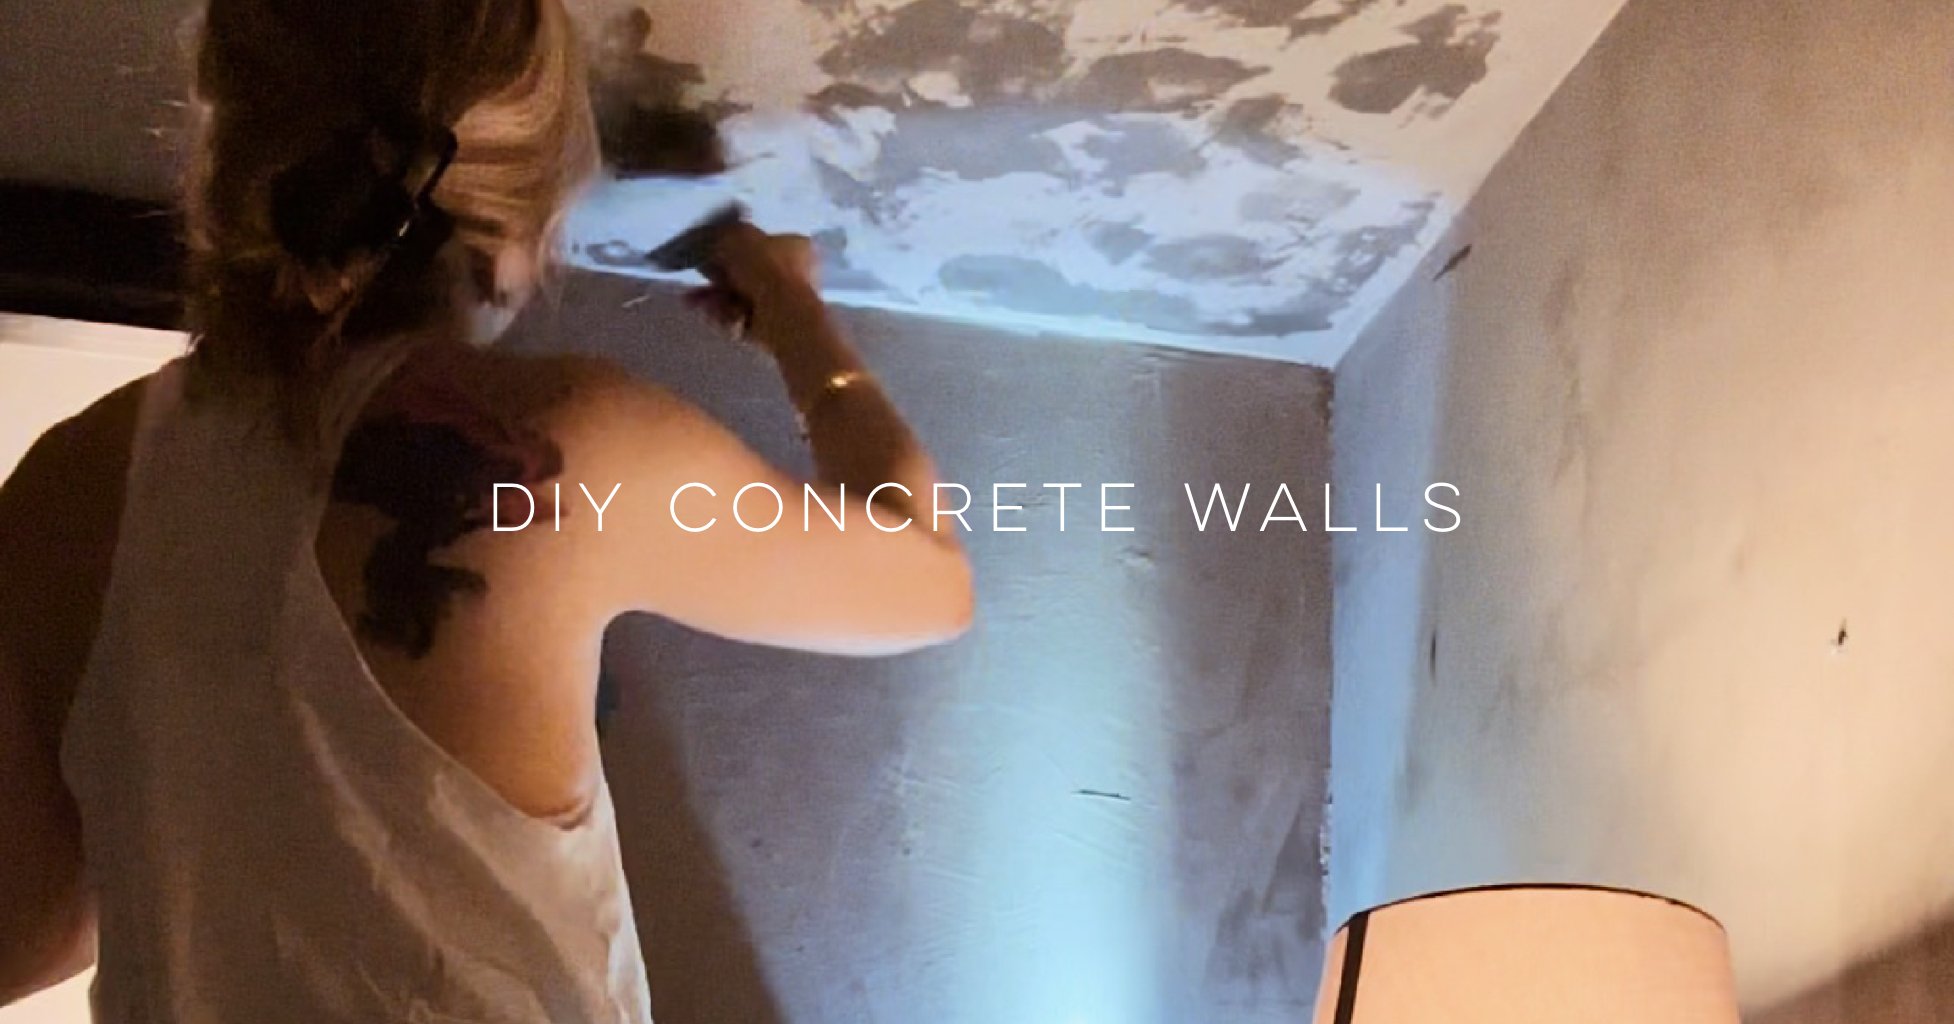
I have always loved the look of concrete. It’s timeless and if you are about imperfection with texture, this could be something to venture in 🙂.
We use the brand HENRY 549 feather finish. Instead of making a big batch of concrete paste, making smaller batches as we go along seems to be more manageable 🪣.
Unfortunately, measuring isn’t our thing and I can’t tell you exactly how we do it 😅. We use about 1/2 cup of mix with a small amount of water and mix it till the mixture becomes a paste. Kinda like a pancake paste 🥞. This is something you have to experiment with and find out what sort of consistency works best for you 👩🏻🔬🧪.
There isn’t a right or wrong method when doing this. It’s really about experimenting and playing. So enjoy the process 👏🏼🥳

HOW TO CREATE A GALLERY WAL WITHOUT USING A MEASURING TAPE
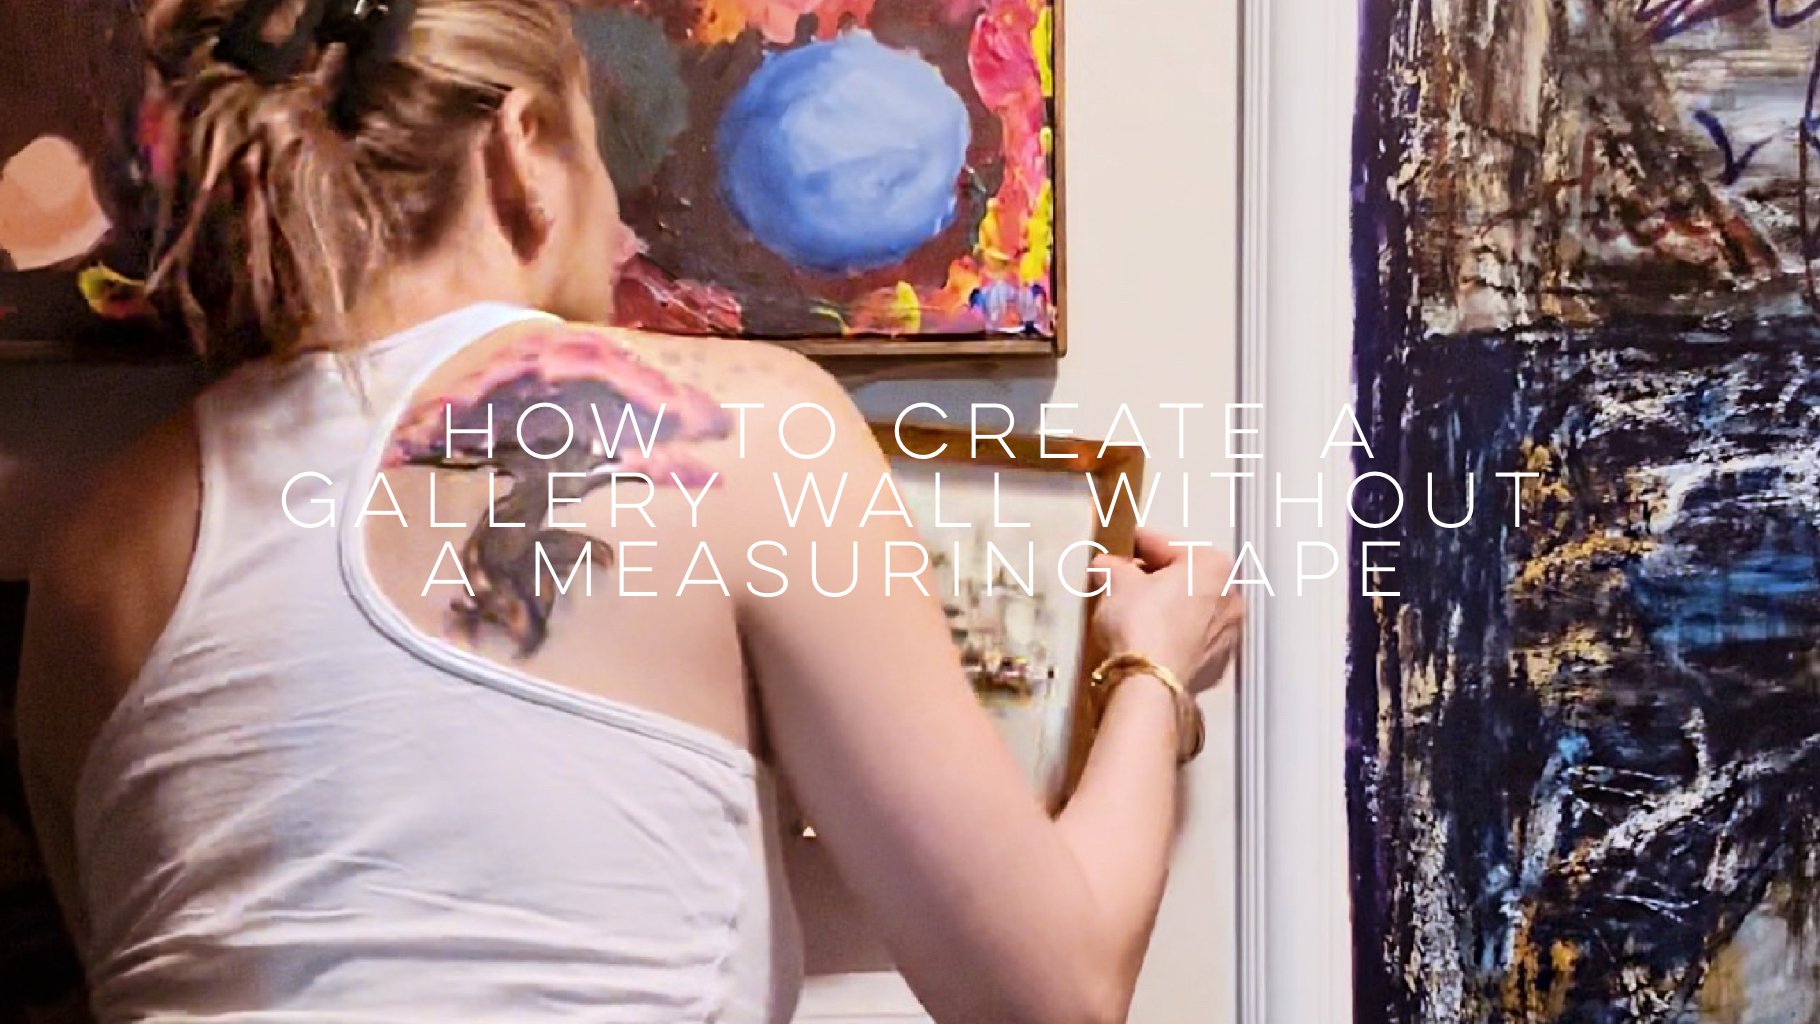
I am not sure if I can explain a theory or methodology to my madness on how to create a gallery wall without a measuring tape 📏🖼️📐. But this is how I do it 🤓👇🏼
1. Look at the back of the artwork and estimate the highest point of where the artwork might be hung from 😅.
2. Eyeball the placement of where you wish to put your artwork 👀📍.
3. Double check the estimated artwork placement 🧐.
4. Say a quick prayer 🙏🏼.
5. Hammer the nail into the wall 🔨.
6. Hang the artwork and hope the eyeballed measurements all worked out 🖼️🤞🏼🤞🏼🤞🏼.
No math or fussing with a measuring tape 😅. It relatively simple, just takes lots of trust and faith to get done ☑️🤓♥️.

GALLERY WALL MELTDOWN
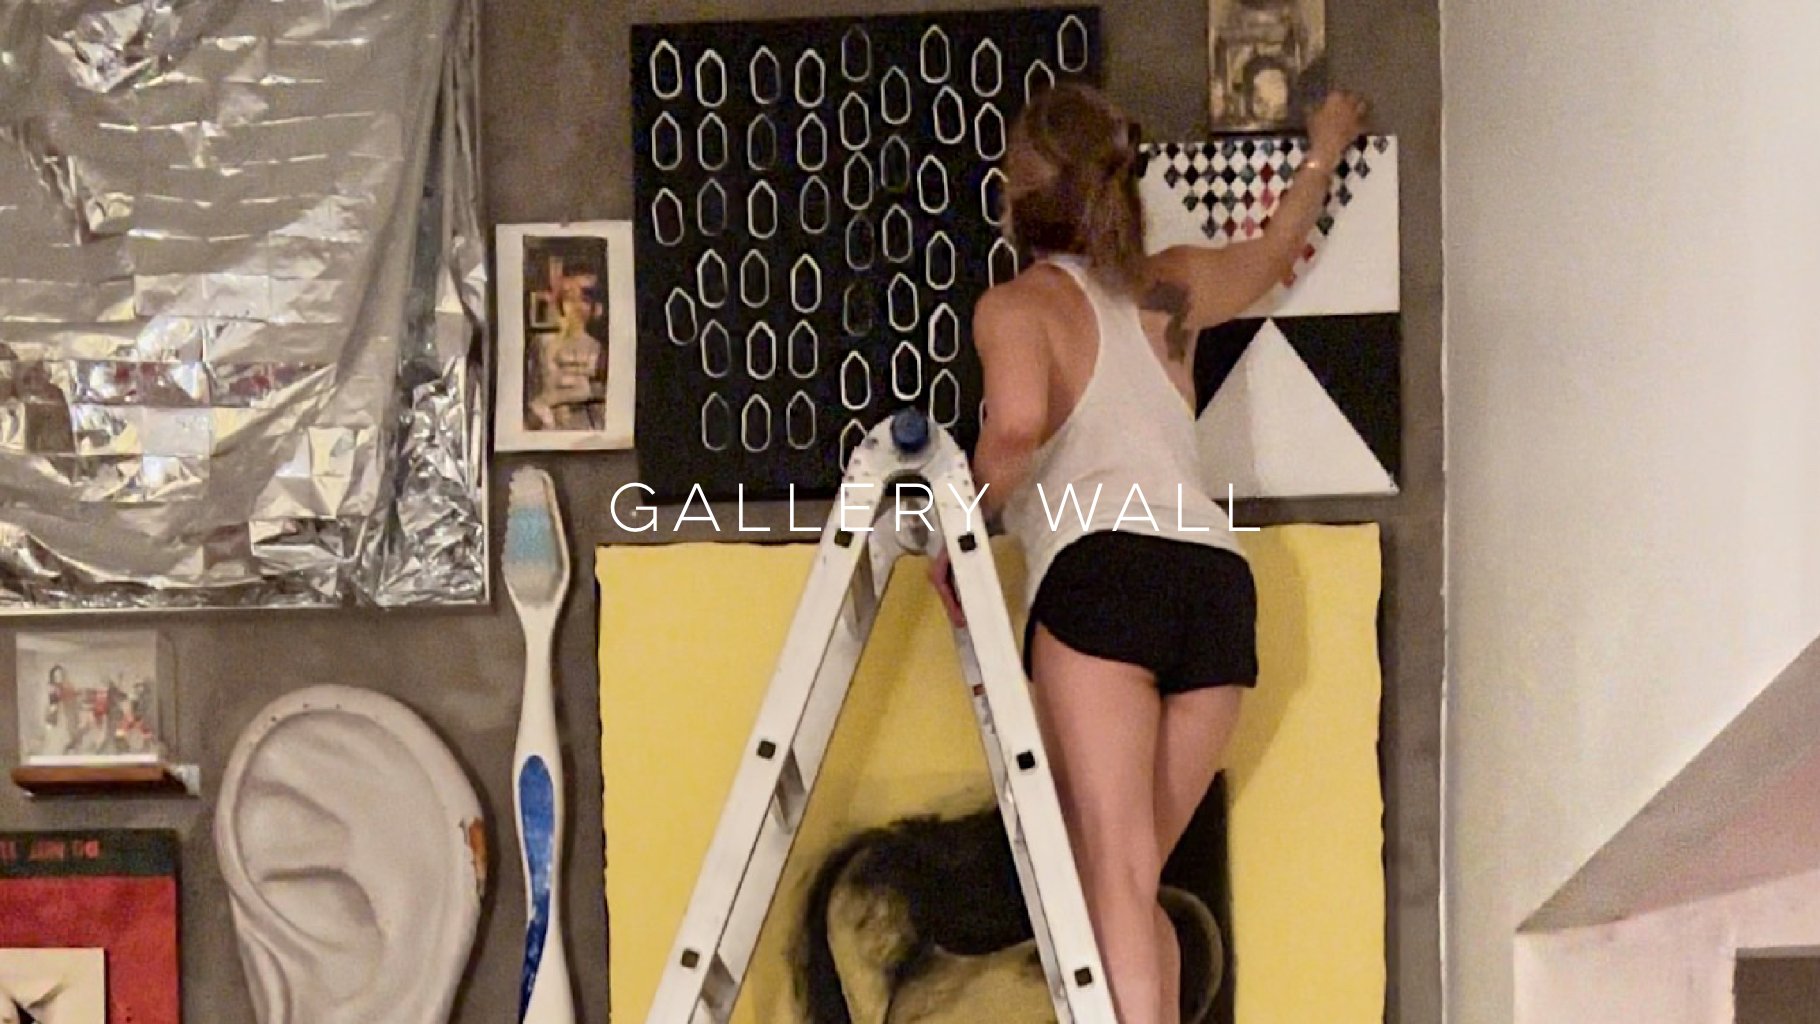
To all my ladies, who uses drills and saws 🪚 , I have so much more respect for you🫡. Always smiling and creating all your amazing projects. I was only using a hammer and nails to create this wall and I almost had a meltdown 😩.
I am not sure who the beast was. Maybe, it was the 12’ 13’ feet wall that I was battling? Maybe, it was the 300lb ladder that I needed to constantly adjust to height🪜. Maybe, it was me refusing to use a measuring tape but preferred eyeballing the placements of all my artworks and objects 👀📏👂🏼🖼️🪥? I don’t know 🤷🏼♀️.
It took an entire evening and 3 cans of hard seltzer🍹🥂🍺 (I highly do not recommend drinking and climbing a ladder🤪) and lots of swearing to complete the entire wall😅.
Happiness is an understatement 🤓👏🏼👏🏼. Also, Happiest Mother’s Day to all who is celebrating 🥳🌹.