

CREATING A CREATIVE STUDIO

CREATING A CREATIVE STUDIO. WATCH THE NEW EPISODE ON YOUTUBE. New episode drops every Sunday at 12pm📷. Please watch and subscribe 🫶🏼. Link in bio.
It took a couple of days and some late nights to turn one of the living room into a creative studio. This has been in my thoughts for a very long time and am beyond happy that this finally happened 💭👏🏼🎈🎉!

New old bedroom
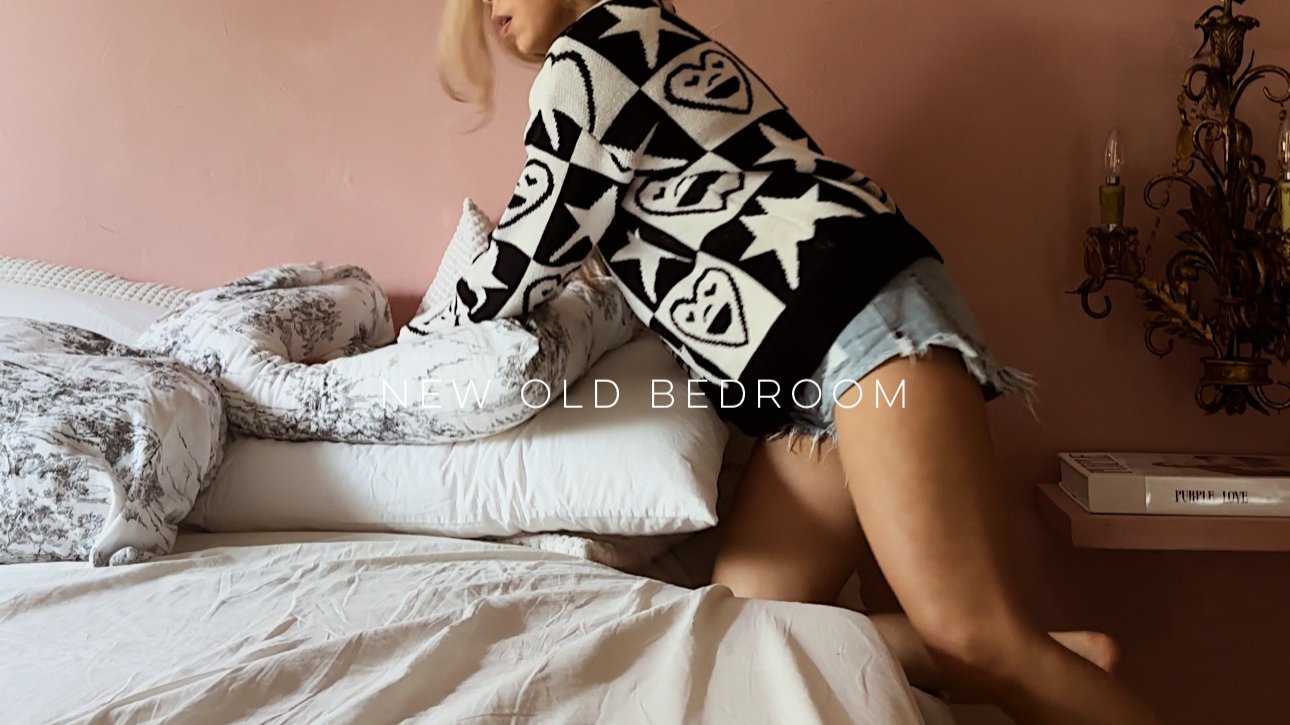
My new old bedroom 💝! As much as I love camping ⛺️ in the living room, it feels so good to be back in the bedroom. We got new floors, a shade of “dirty” pink on the walls, new old light fixtures and the platform bed that I always wanted🛏️🍪🖼️💡🍸. Happiness👏🏼👏🏼🎉 ! Life is so good 🤓✌🏼.
📌Base color : BEHR Dynasty Marquee Bubble Shell
📌Top color : BEHR Dynasty Marquee Pink Quartz

LAYER YOUR LIGHTS
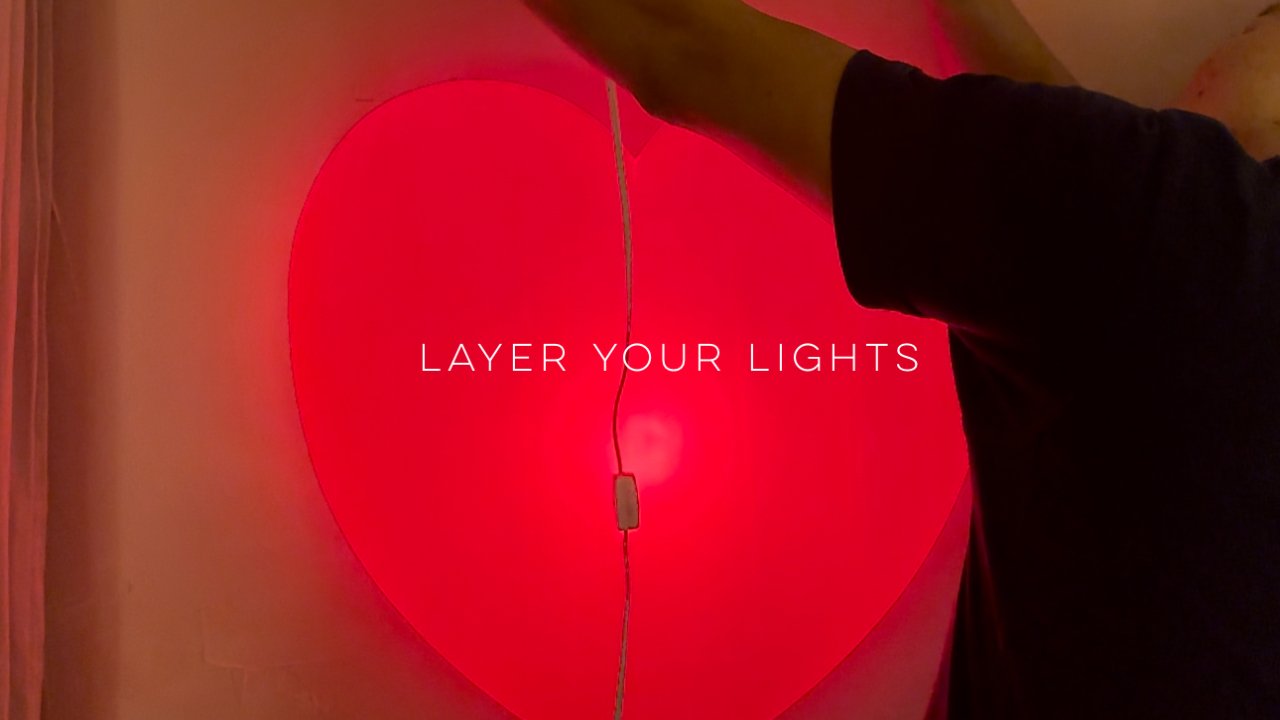
When designing a room, always layer your light fixtures. Have a variety of different styles and shapes of light fixtures like table lamps, floor lamps, chandeliers, night lights… etc. This will create warmth and cast interesting shadow shapes on the wall, which gives the room depth and interest making the space extra cozy 💡🩷❤️🔌.
♥️ Vintage heart shape lights are from @round.plump.apple
BEDROOM FLOATING SHELVES
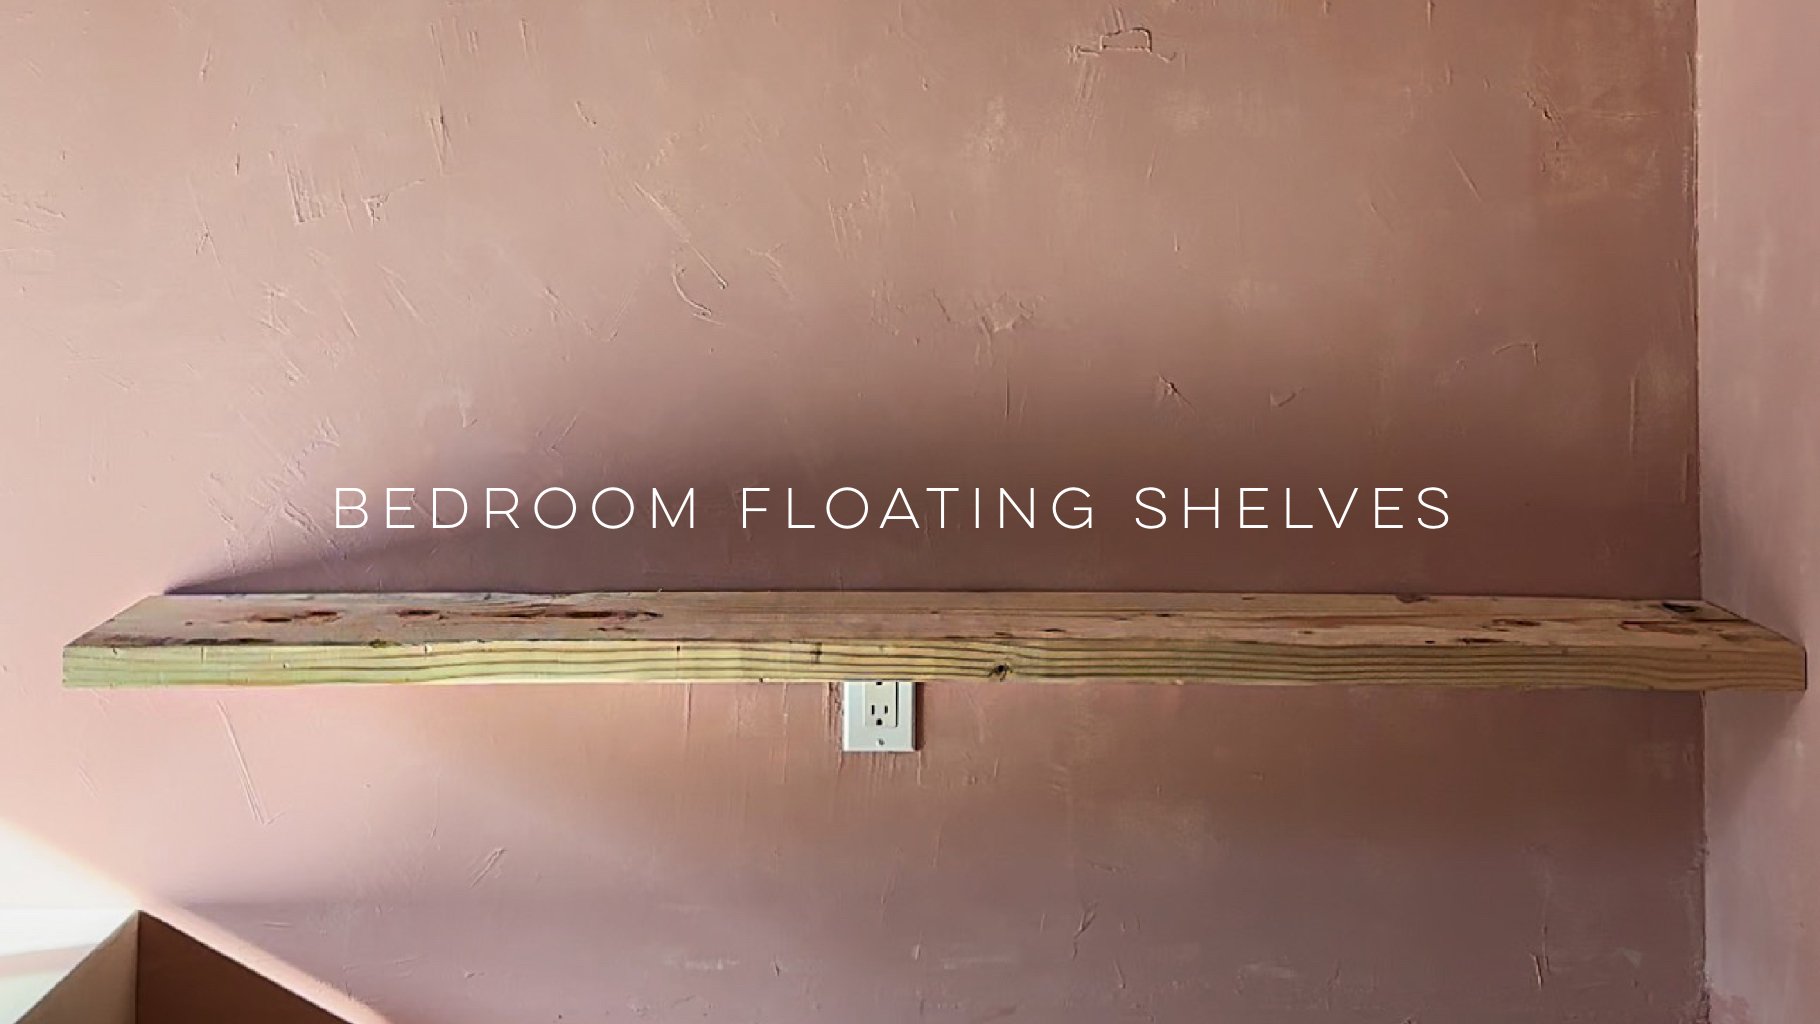
For a little while, I had internal debates about what’s more appropriate for our bedside 1️⃣ side tables or 2️⃣ floating shelves?
For now, it’s floating shelves for the win 🥇. Order a couple of metal brackets from Amazon, picked up some 11 1/4” wide by 1 1/2” thick framing lumber from Home Depot, cut them to size and mounted them on the wall📏🪚🔨🧰.
I must admit the hardest part of hanging these shelves was trying to figure out what was ideal height for them to be at 💬. After much debate, again, we decided to have the floating shelves the same height as our mattress 👌🏼.
Next up, would be to cement and paint the shelves 👏🏼

Never be afraid to do this when designing a space 👉🏼 Juxtapose.

Never be afraid to do this when designing a space 👉🏼 Juxtapose. Try mixing different design styles, objects from eras, different make of materials… all of that can create the unexpected. The element of surprise is what keeps the space interesting and uniquely your’s.
Creating the unexpected 👉🏼 I decided to switch out the chain that is attached to this vintage rococo chandelier for a blue and white striped rope. This gives the chandelier a more modern feel 🔗✨👌🏼. Instead of hanging the chandelier high up ( like how it normally would be hung ), I hung it low.

Someone asked “ Can you show how you tied the rope to the light?”

Someone asked “ Can you show how you tied the rope to the light?”
I don’t remember who taught me how to tie this specific knot nor the name of it but I do know it secures really well.
You take one end of the rope and loop it around 3 times, 5 times or whatever that works for you. Next, take that end of the rope and shove it through the middle of the loops you just made. Lastly, pull on it really tight to secure your knot.
Do remember to buy your rope a couple of feet longer than what you actually need. More is always better than less, well at least in this situation 😅.


CEMENT FLOORS
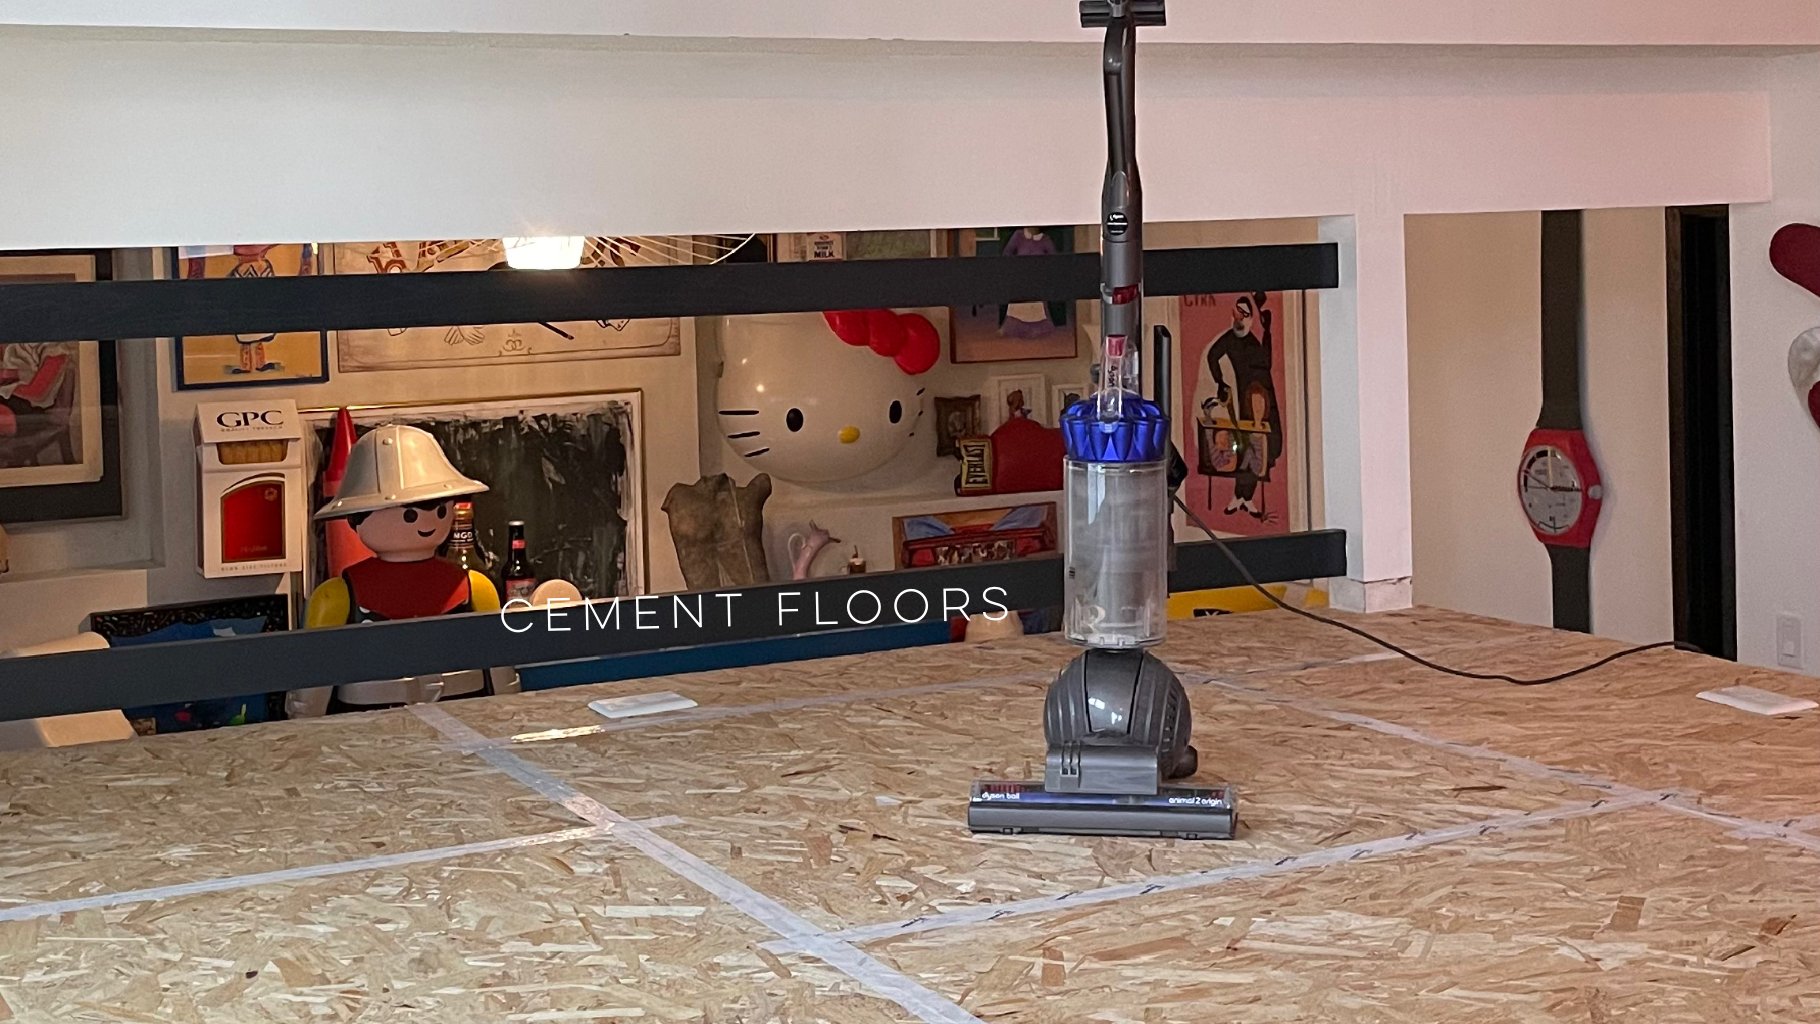
I will pick concrete floors any day, over any material 🤓✌🏼. It has so much movement, imperfections and will always be timeless❤️🔥.

How to paint your floors white ⬜️

I would choose painting floors over walls any given day. The hardest part of painting floors is clearing out the space 🪑🛋🪆🐪. Here are 3 simple steps on how to paint your floors white ⬜️ , maybe 4, if you have wood floors.
🪅Remove scuff marks or stains. Mr. Clean Magic eraser does a really good job with that.
🪅Mop and clean the floors. You don’t want any sort of dirt, hair… when painting floors. This will allow a smooth application of the paint.
🪅We painted two coats of BEHR PREMIUM® Porch & Patio Anti-Slip Floor Paint and let the paint dry for about 48hours before moving furniture back into the space.
🪅Step 4, which is really step 1, if you have wood floors 😅. You will need to sand them down first with a medium grit sandpaper. And later, a fine grit sandpaper for finishing.
Finally, enjoy ❌⭕️❌⭕️

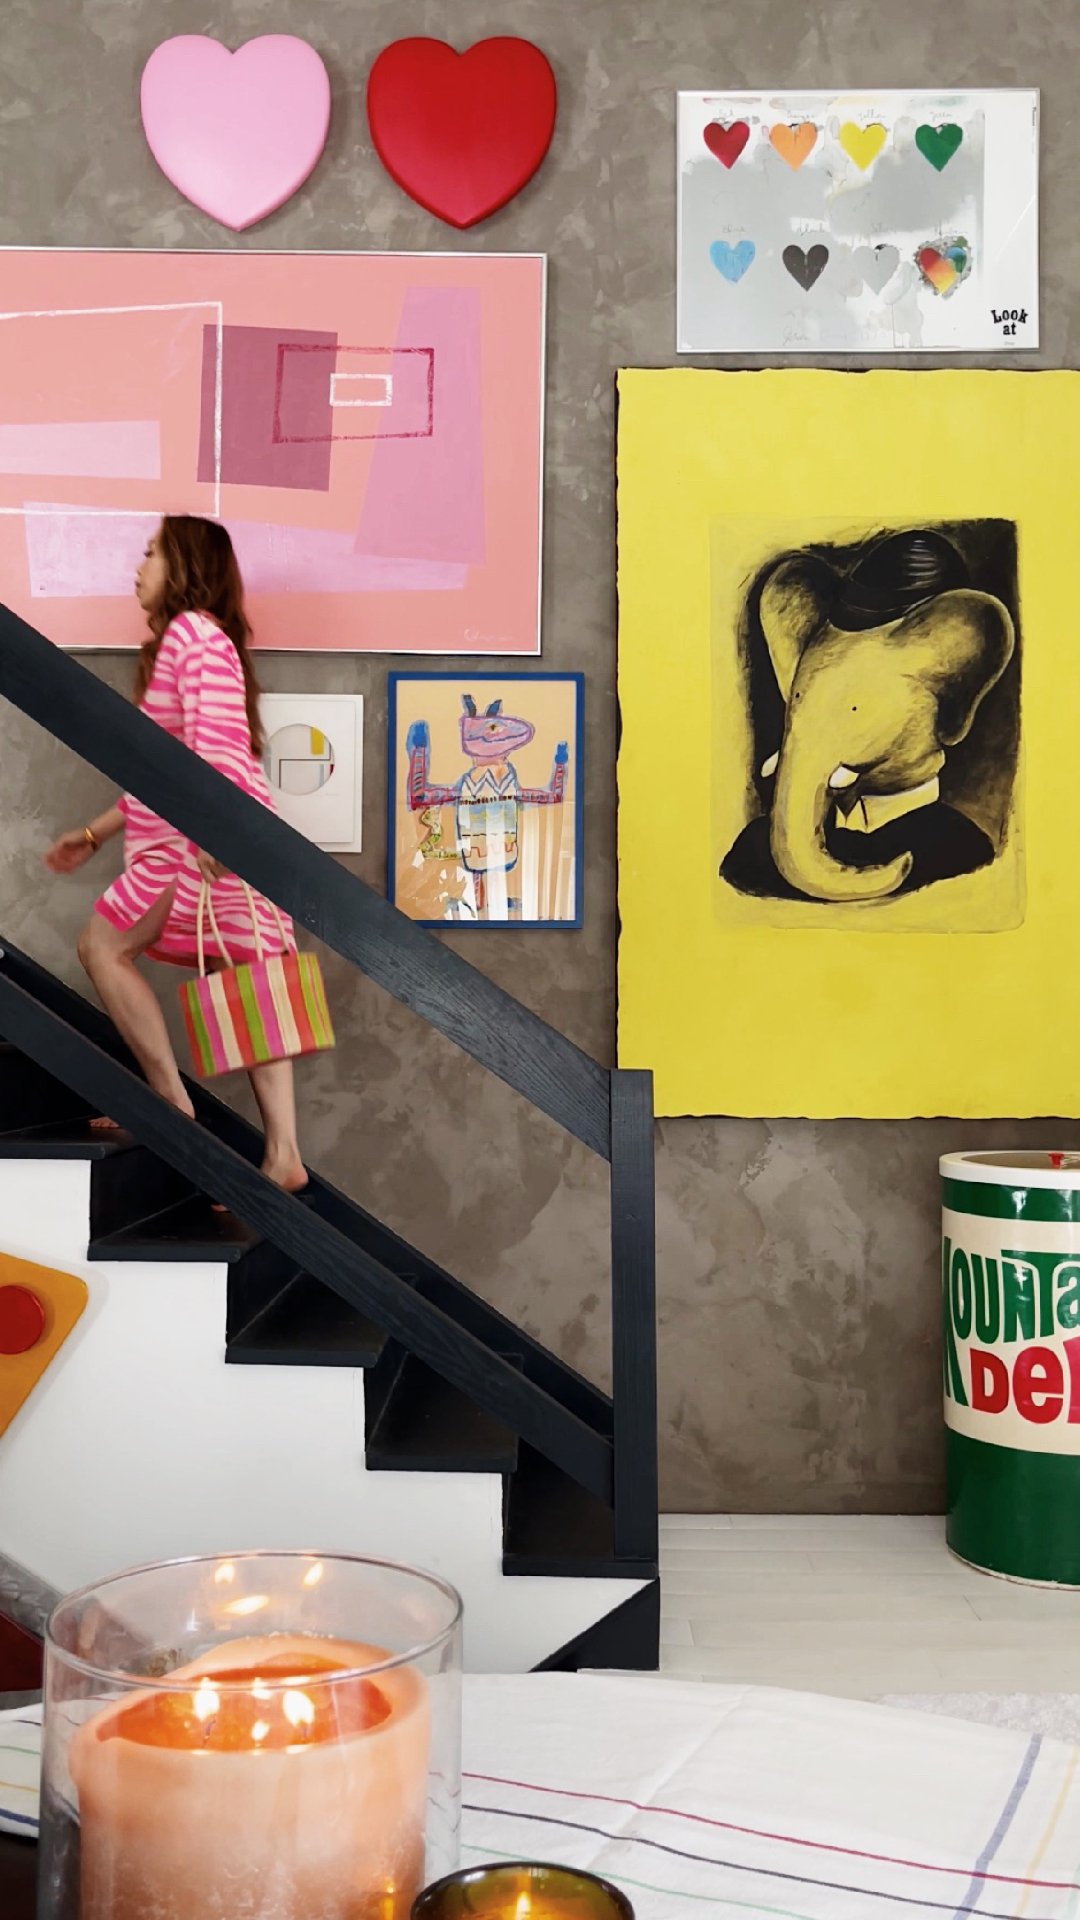
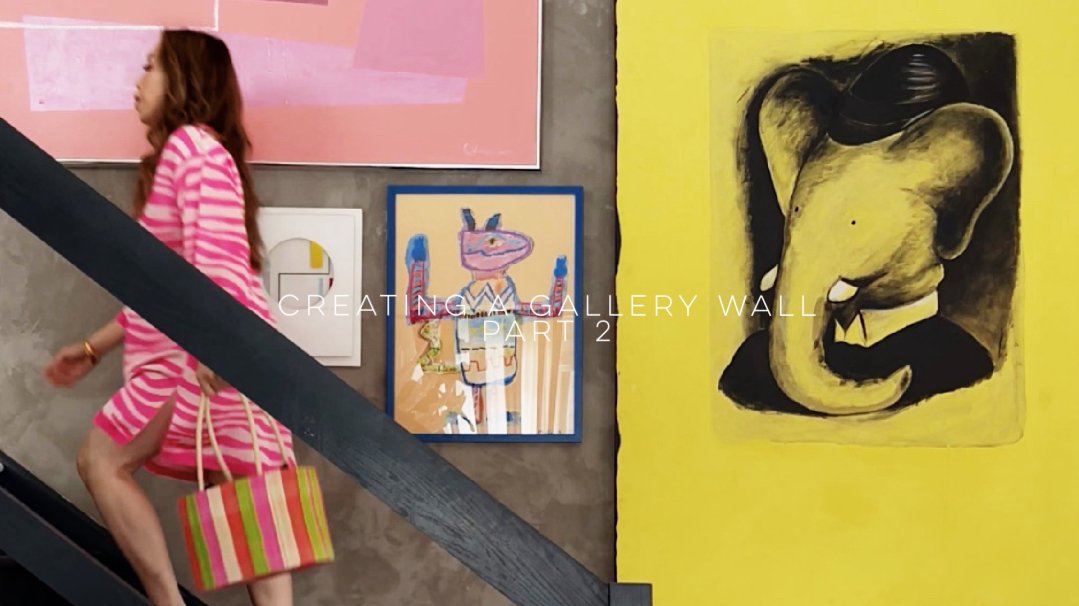
Building a Gallery Wall 🖼🔨

Gallery walls are like puzzles . They take time to build - 3 nights of shuffling. Figuring where to begin and to end . What pieces of artworks goes with what . Most importantly, finding the right balance and knowing when the wall is “done”. Or will it ever be done
Creating a gallery wall, Part 2 🖼🪜✌🏼.
I always keep in mind 💭 , especially working on a big wall.
🔨Start with your biggest piece of artwork. That will allow you to have a better idea or view of how much wall space it will be taking up.
🔨 Create balance with contrast. Have a mix of horizontal and vertical artworks. That will help create visual interest.
🔨 Play with shapes. Don’t restrict the wall with only artworks. Different objects help create texture and dimensions.
Remember, have FUN and PLAY 🎉. There isn’t any right or wrong, experimenting is part of the creative process. ❌⭕️❌⭕️
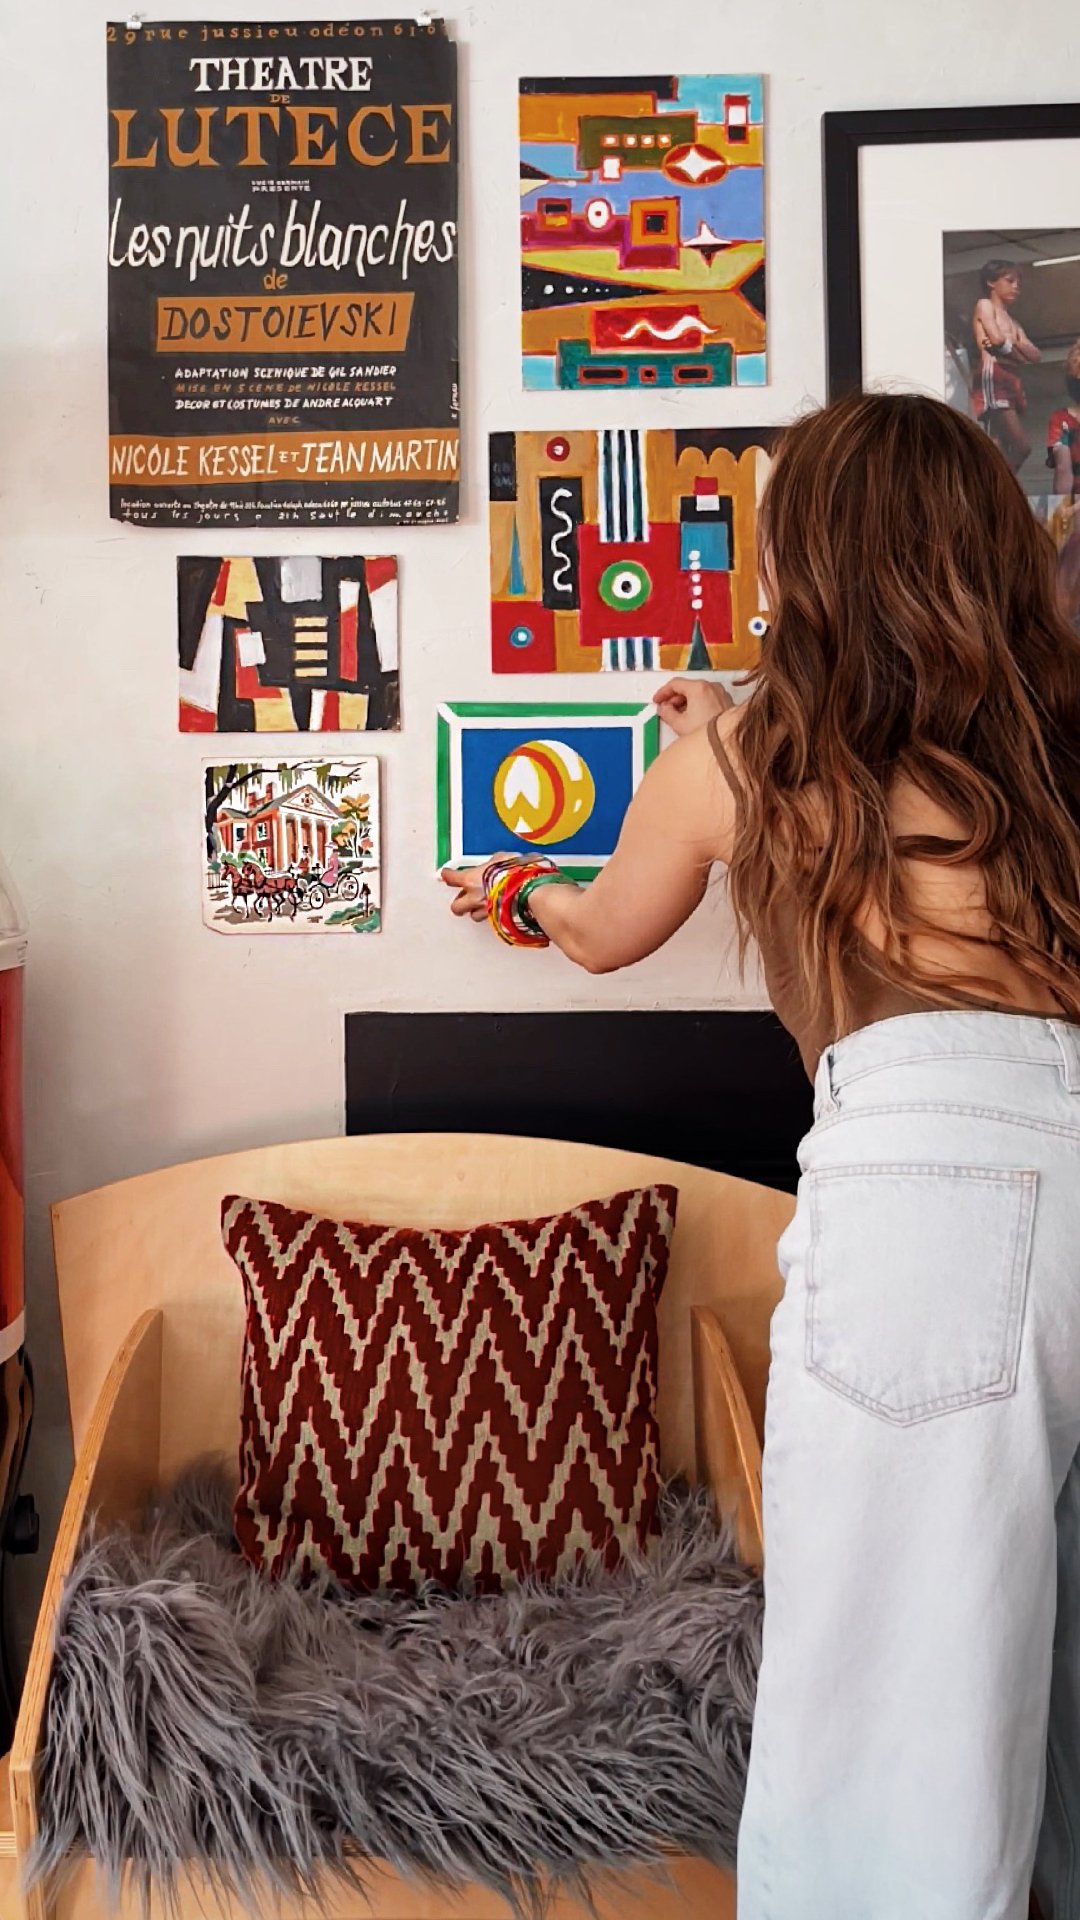
Hang your frameless artwork in less than five minutes ⏱🖼🔨
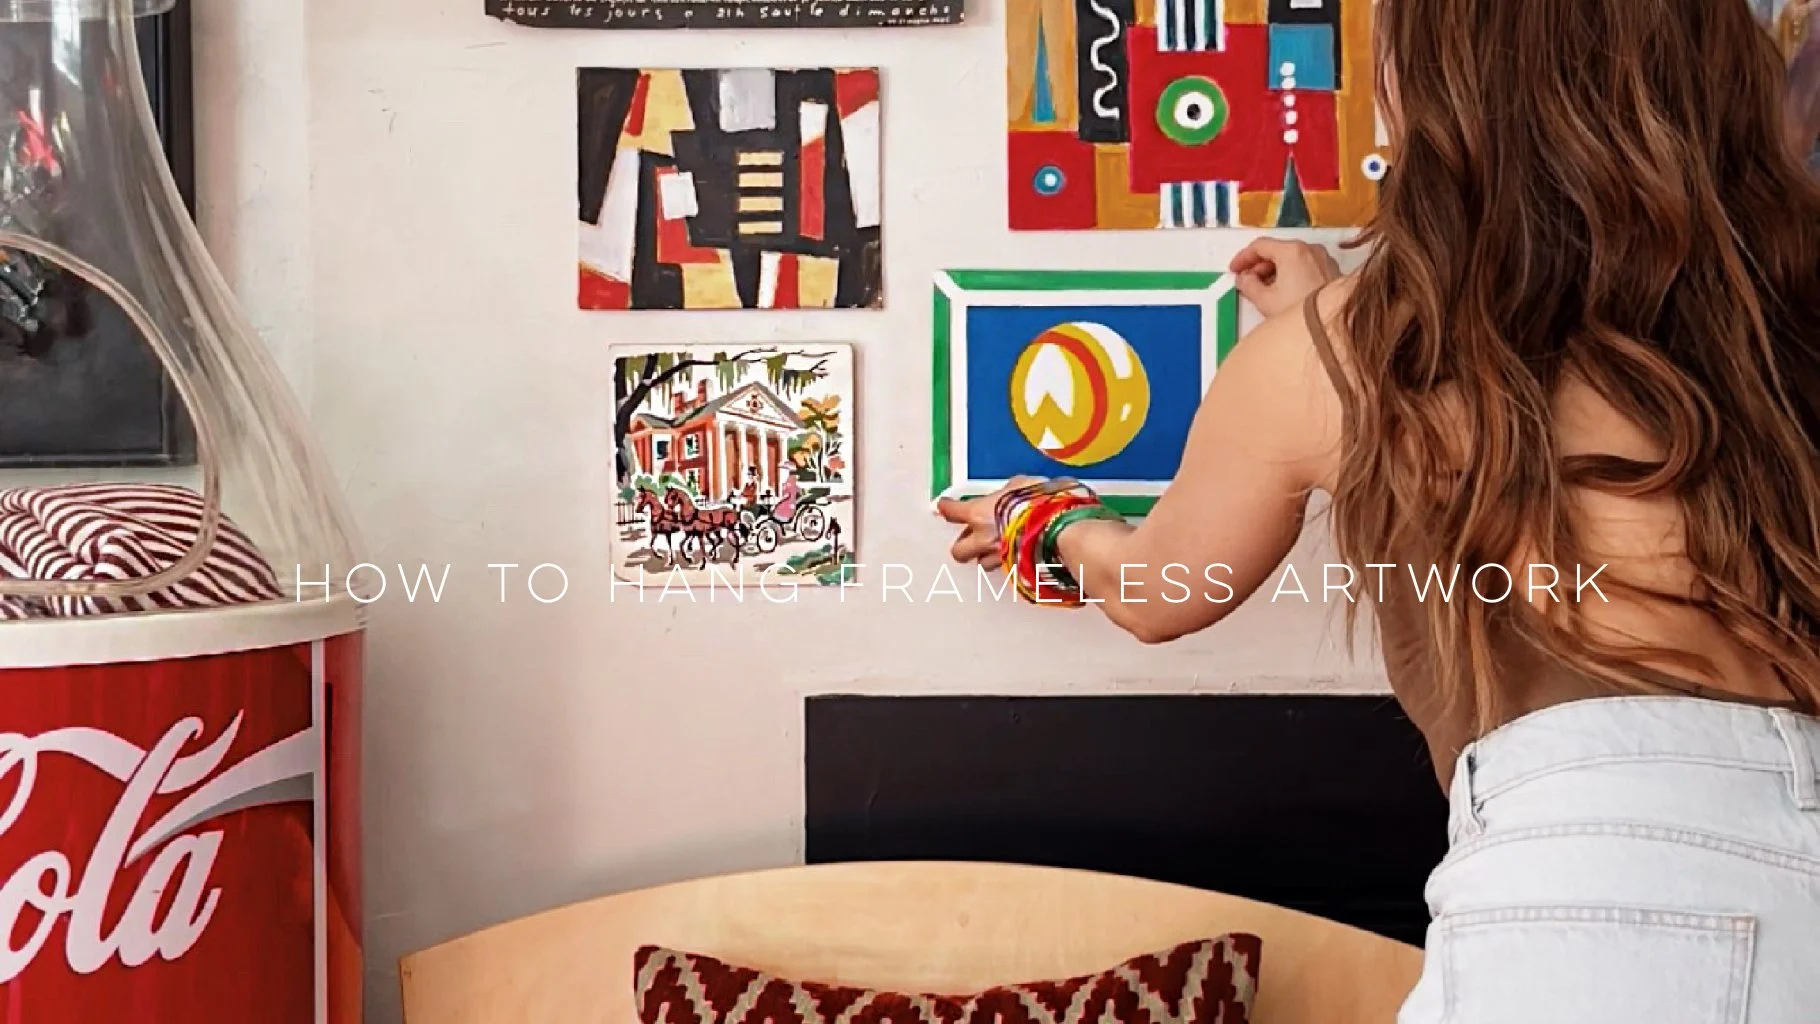
All you need are 👇🏼
✔️1 Picture hanging kit from the hardware store 🏬
✔️A bottle of Gorilla Super Glue 🦍 or any preferred brand of super glue.
✔️ A pen and ruler 📏🖊
📌Measure the center of the artwork with a ruler and market it with a pen.
📌Dab a little superglue on both sides of a sawtooth hanger.
📌Place the sawtooth hanger in the middle of the artwork and wait for about 45 seconds for the superglue to dry.
📌Now the artwork is ready to be hung and enjoy 🔨🤩.

How To Style A Coffee Table 🔒💡🍓
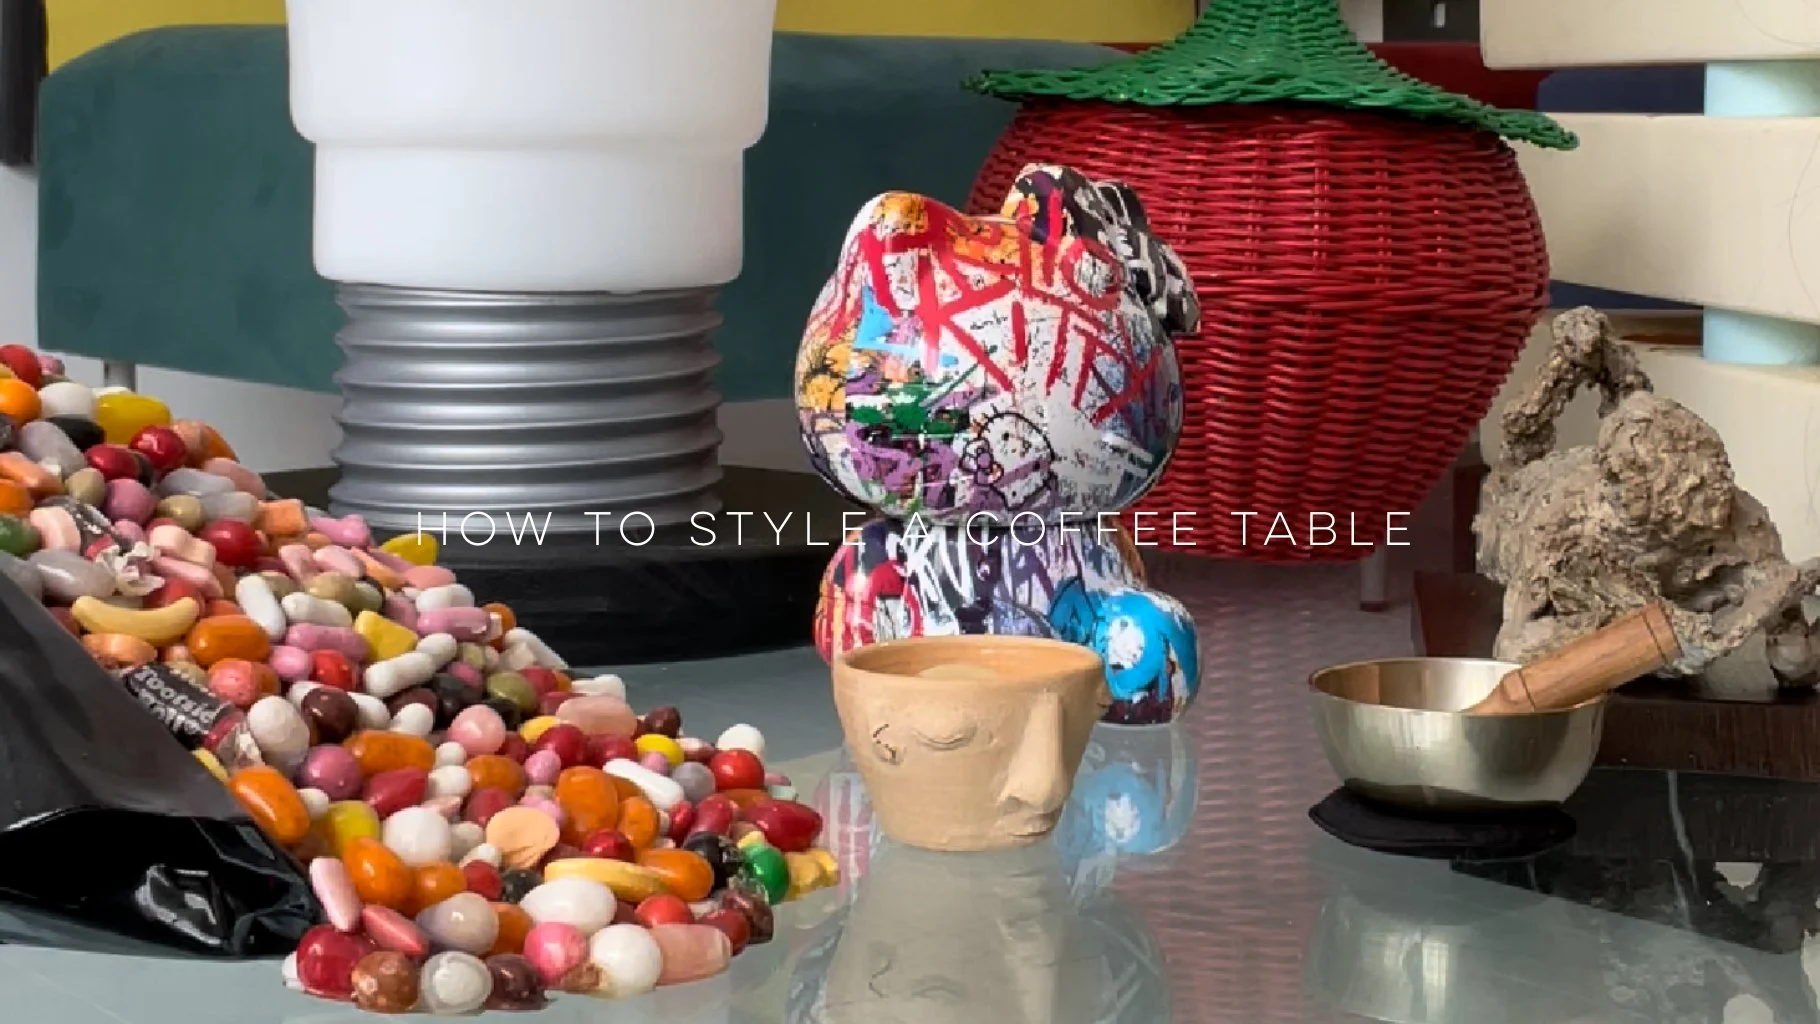
Styling a coffee table is like creating a landscape of different kinds of touchable artwork💡💎💊. Here are 4 things I always keep in mind📝:
✔️Play with height to keep the eyes moving👀. Use objects with a variety of height, nothing is ever too tall or too short 🟥▪️◽️.
✔️Play with colors to create interest. No rules, all colors are welcome❤️🧡🤎💛💚💙💜.
✔️Play with texture to create contrast. Again, no rules. All materials are welcome 🤗, like wood, rattan, ceramics etc…🔒🧸⚱️📚.
✔️ And most importantly, PLAY and have FUN doing it🎈🎉!

Entryway facelift 🧰🔨🪜

It’s a spiraling🌀effect from my recent find, a pencil coat rack ✏️🤓✌🏼.

How to make a shower curtain rod “disappear” 😅🚿
I could not enjoy the view of my shower curtain rod 😅🚿,so I kindly🤓🍦🍭asked my contractor a.k.a Frank 🙋🏻♂️🧰🪛🔨🪚, if he could make some minor edits for me 🎉👏🏼.

Master BATHROOM RENOVATION
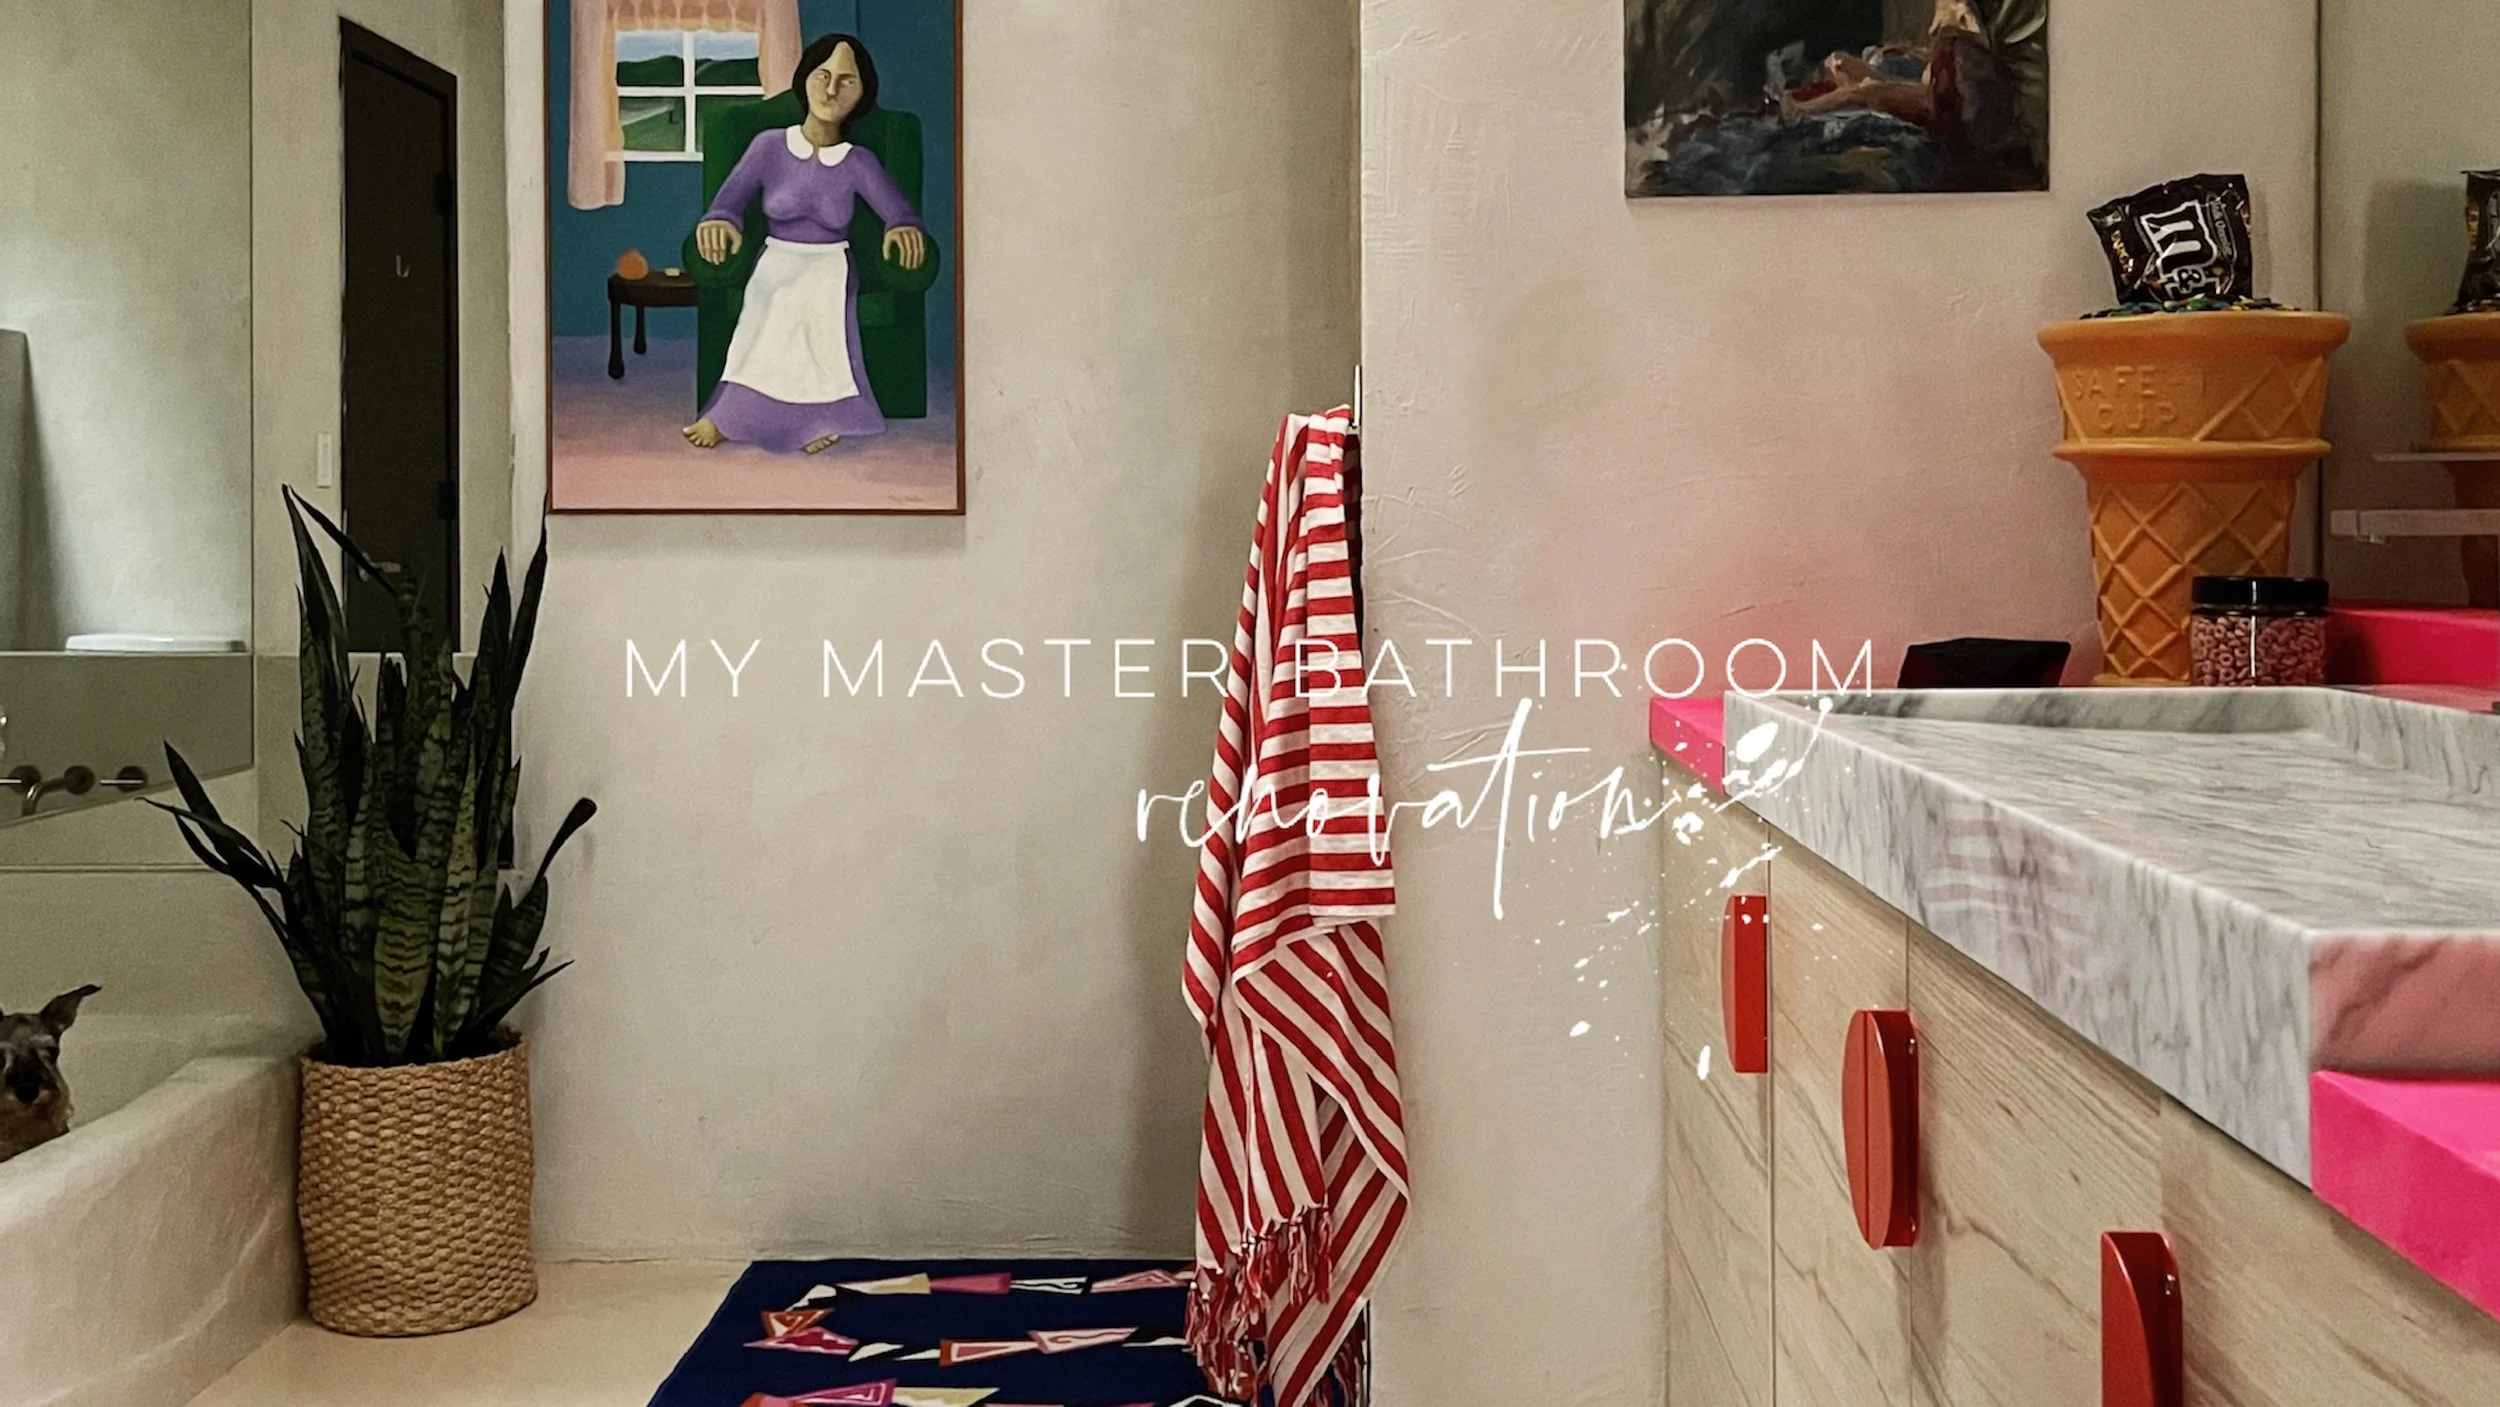
Vanity
Signature Hardware 49" Polished Carrara Marble Trough Sink
Delta Single Hole Bathroom Faucet with Drain Assembly
IKEA BEGRIPA Handle, orange/half-round5 1/8 "
IKEA ASKERSUND Door, light ash effect
Floors and shower
Delta Trinsic Shower Faucet with H2Okinetic Technology
CONTINUO Micro-Cement Coating by San Marco ~Continuo Living
Tub